
Now that I have the workshop built and can actually start using it (there will be a before/after pictorial on the building of the workshop soon, I promise), I finally have a chance to get in and do some work on Porkchop that has been delayed.
Of course, as is par for the course, things are not as straightforward as it seems like it should be.
The Twisted Jeep
Ages ago I knew that Porkchop had a problem with his stance. If you looked at the test drive from about a year ago (man, I can’t believe it’s been that long) I noticed that as I was pulling into the garage that it seemed to be lilting.
[youtube=”https://www.youtube.com/watch?v=FlfCd24aY3Q”]
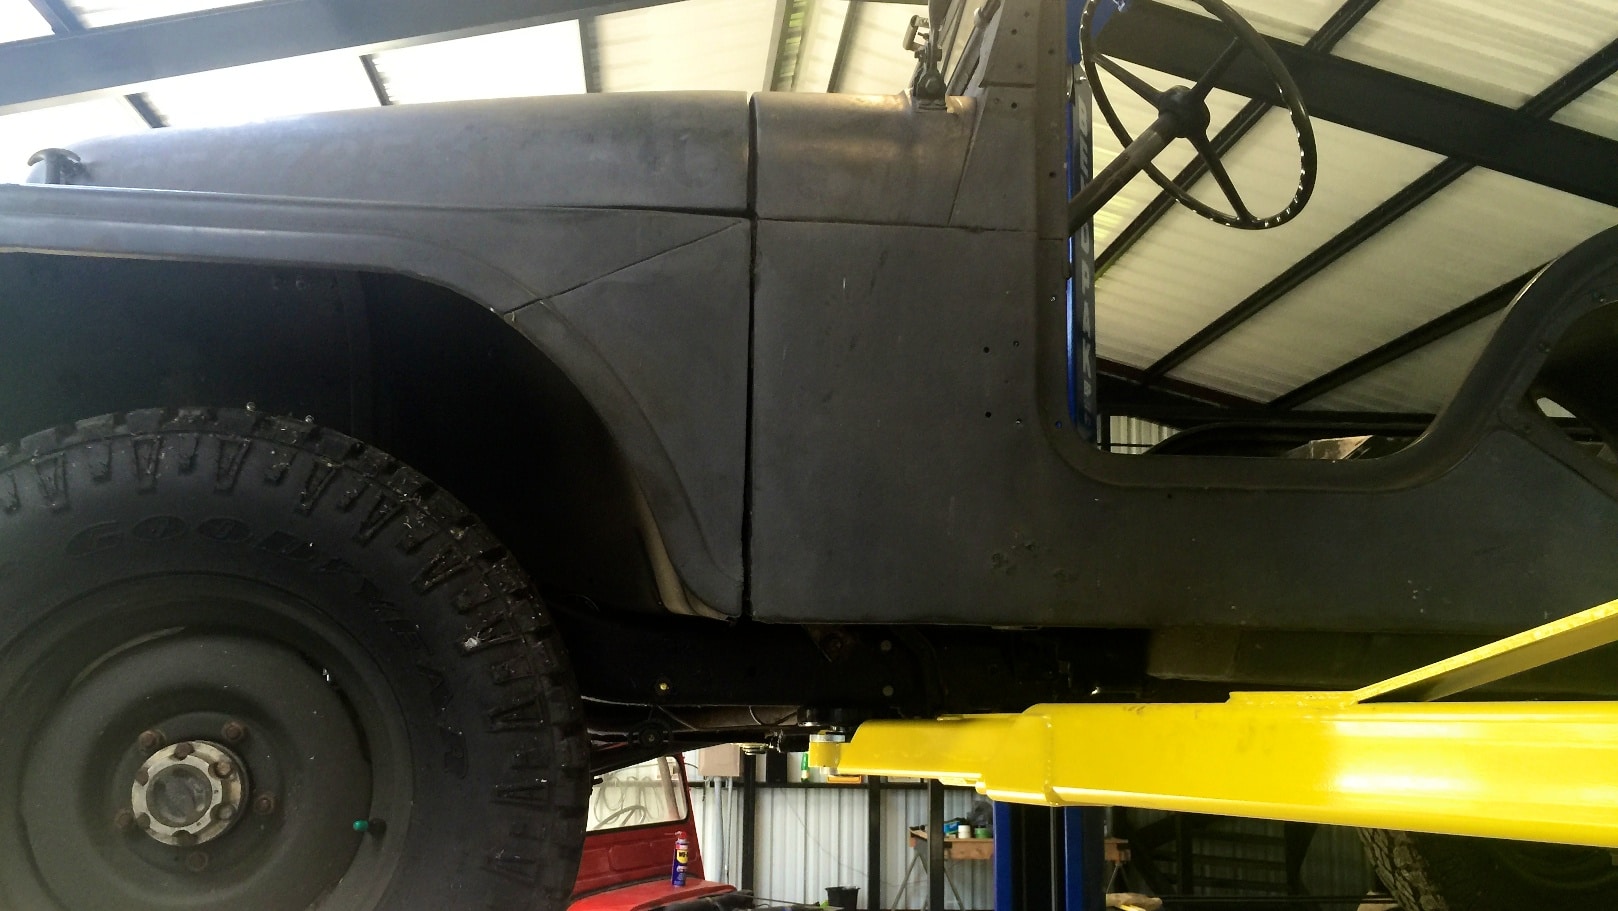
You can also see it here, though the angle of the photo makes it look a lot worse than it actually is:
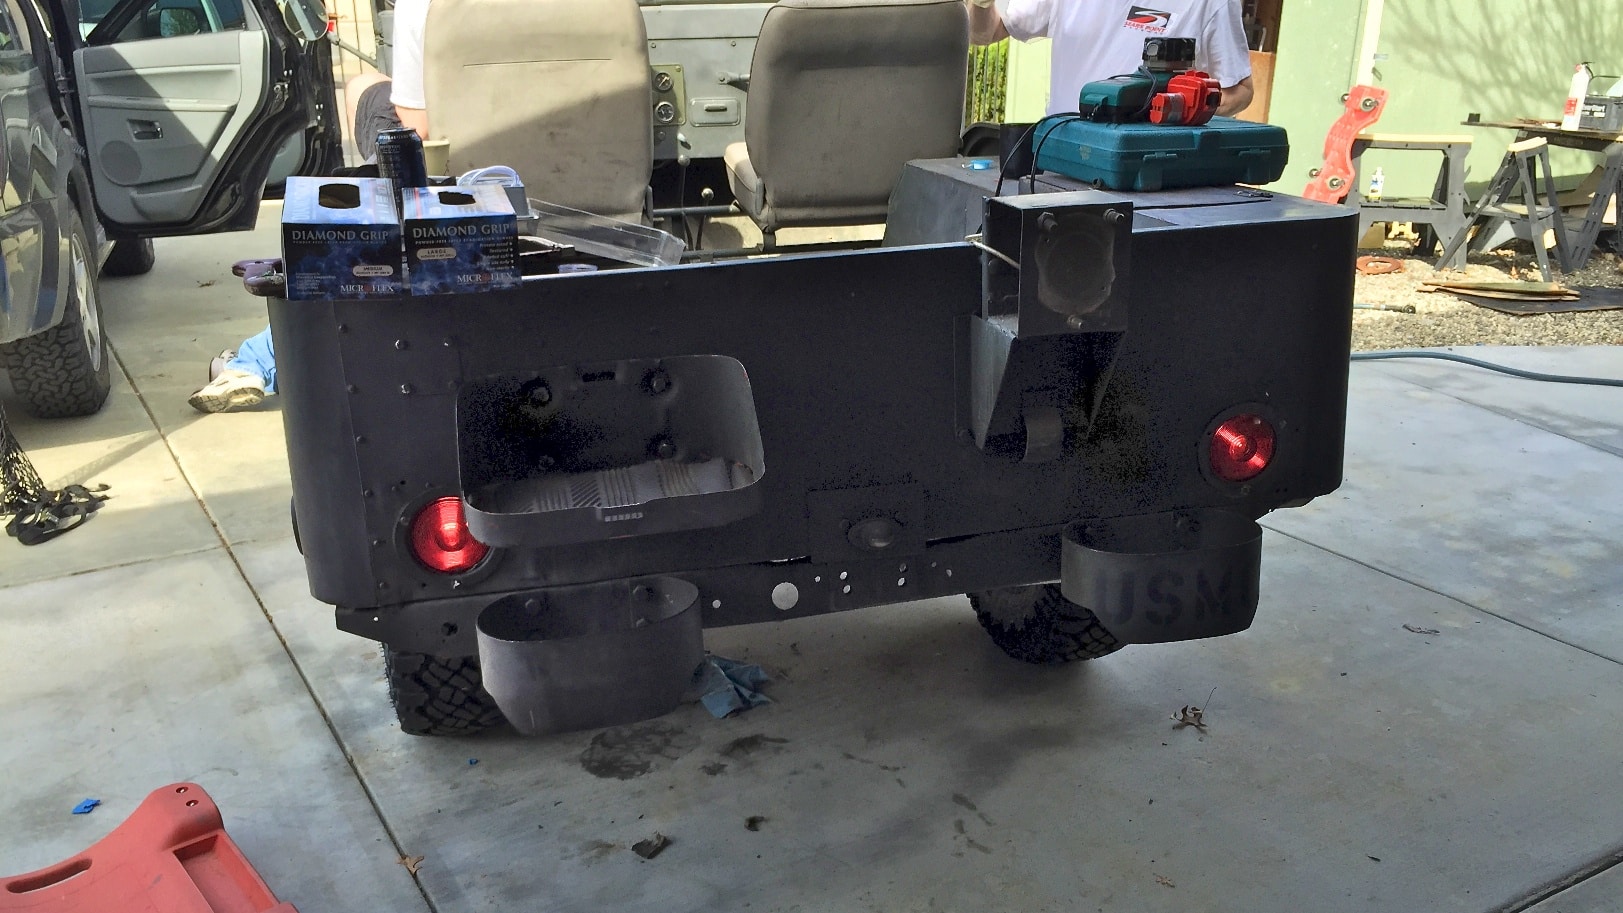
Why is the left side lower than the right!?
After doing some examination, it became apparent that Porkchop’s body was not aligned/mounted onto the frame properly. However, I was moving at the time and was unable to look too far into it.
Today I was finally able to see what was going on, and I didn’t really like what I saw.
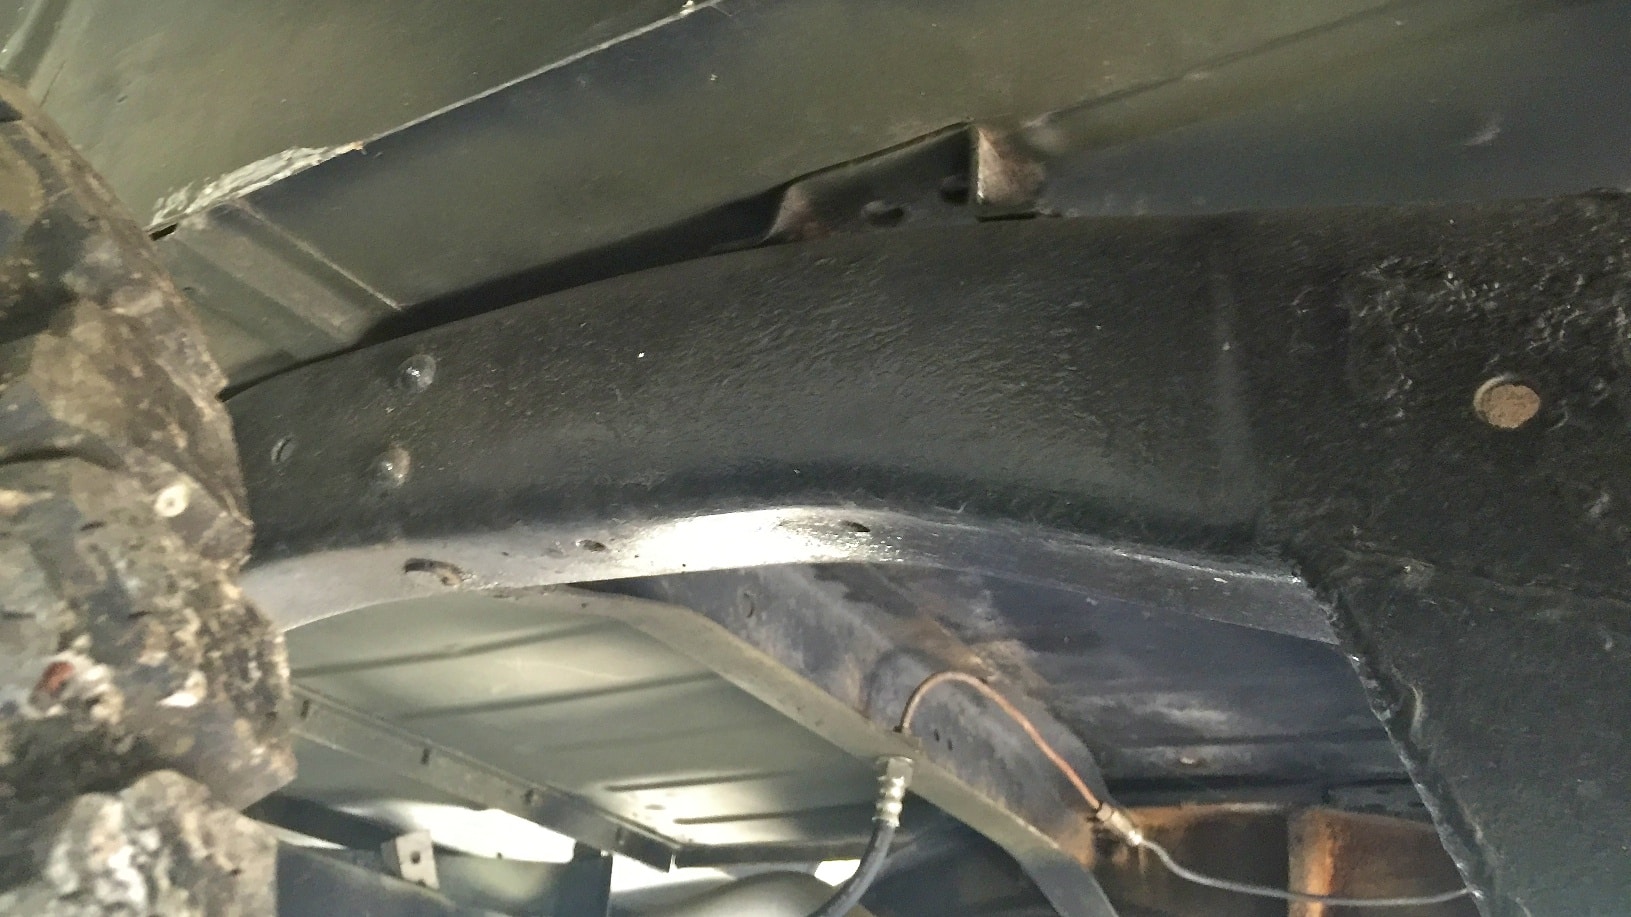
The first thing I noticed was when looking at the frame and body mounts was that there was a major crack in the support brace.
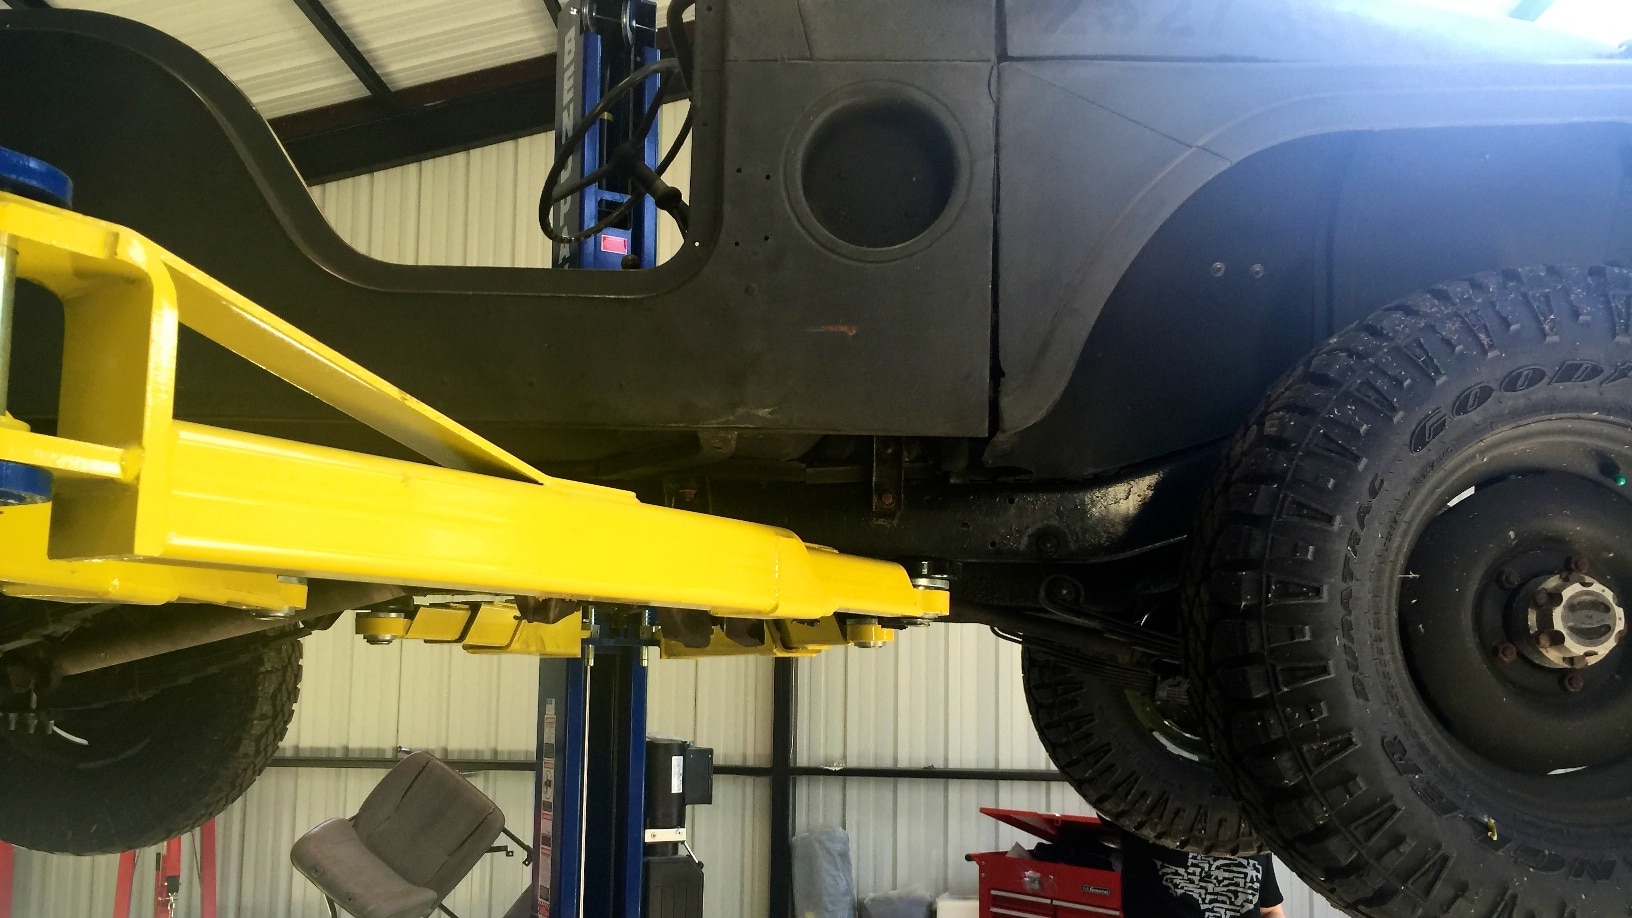
When looking at the passenger side of the jeep, it’s right above where the lift arm is supporting Porkchop:
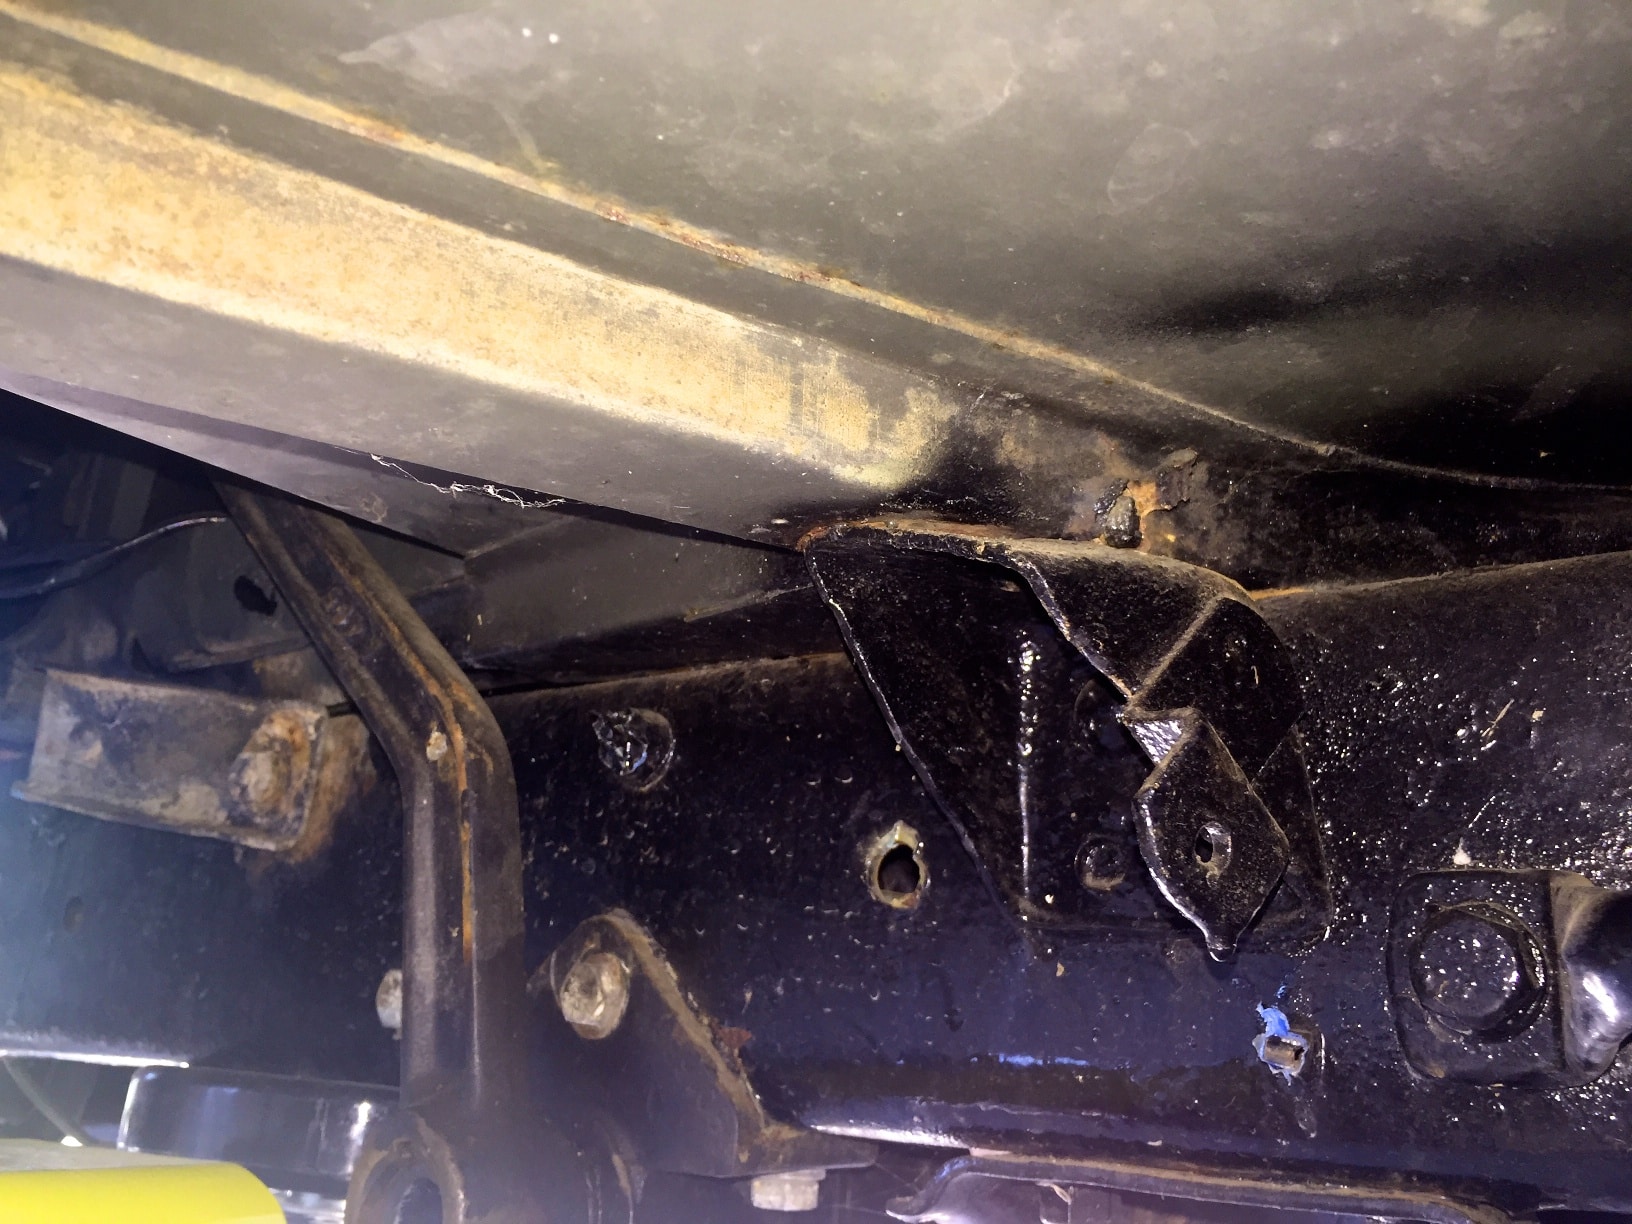
Close up underneath, though, there’s no confusion here:
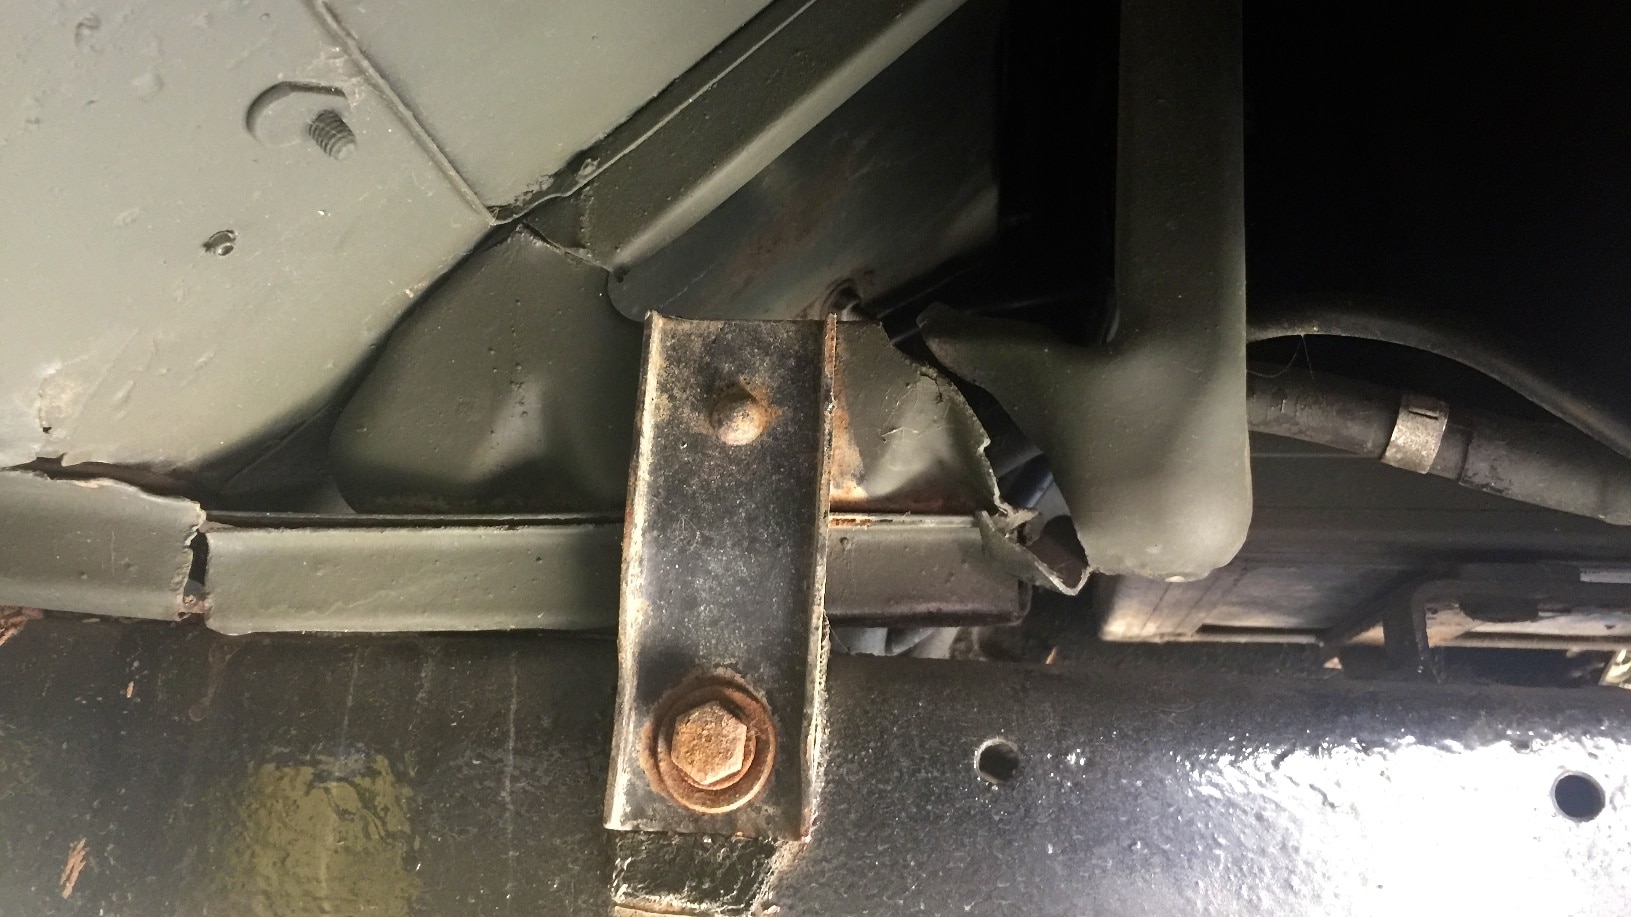
Obviously, there has been some stress that has caused this to take place. I went back and took a look at some of the pictures that I took during Porchop’s undercarriage painting, but I didn’t have any really good shots of this particular angle. From what I could tell, however, there was already a crack in this body mount part. I can’t tell if it was this much of a gap, though.
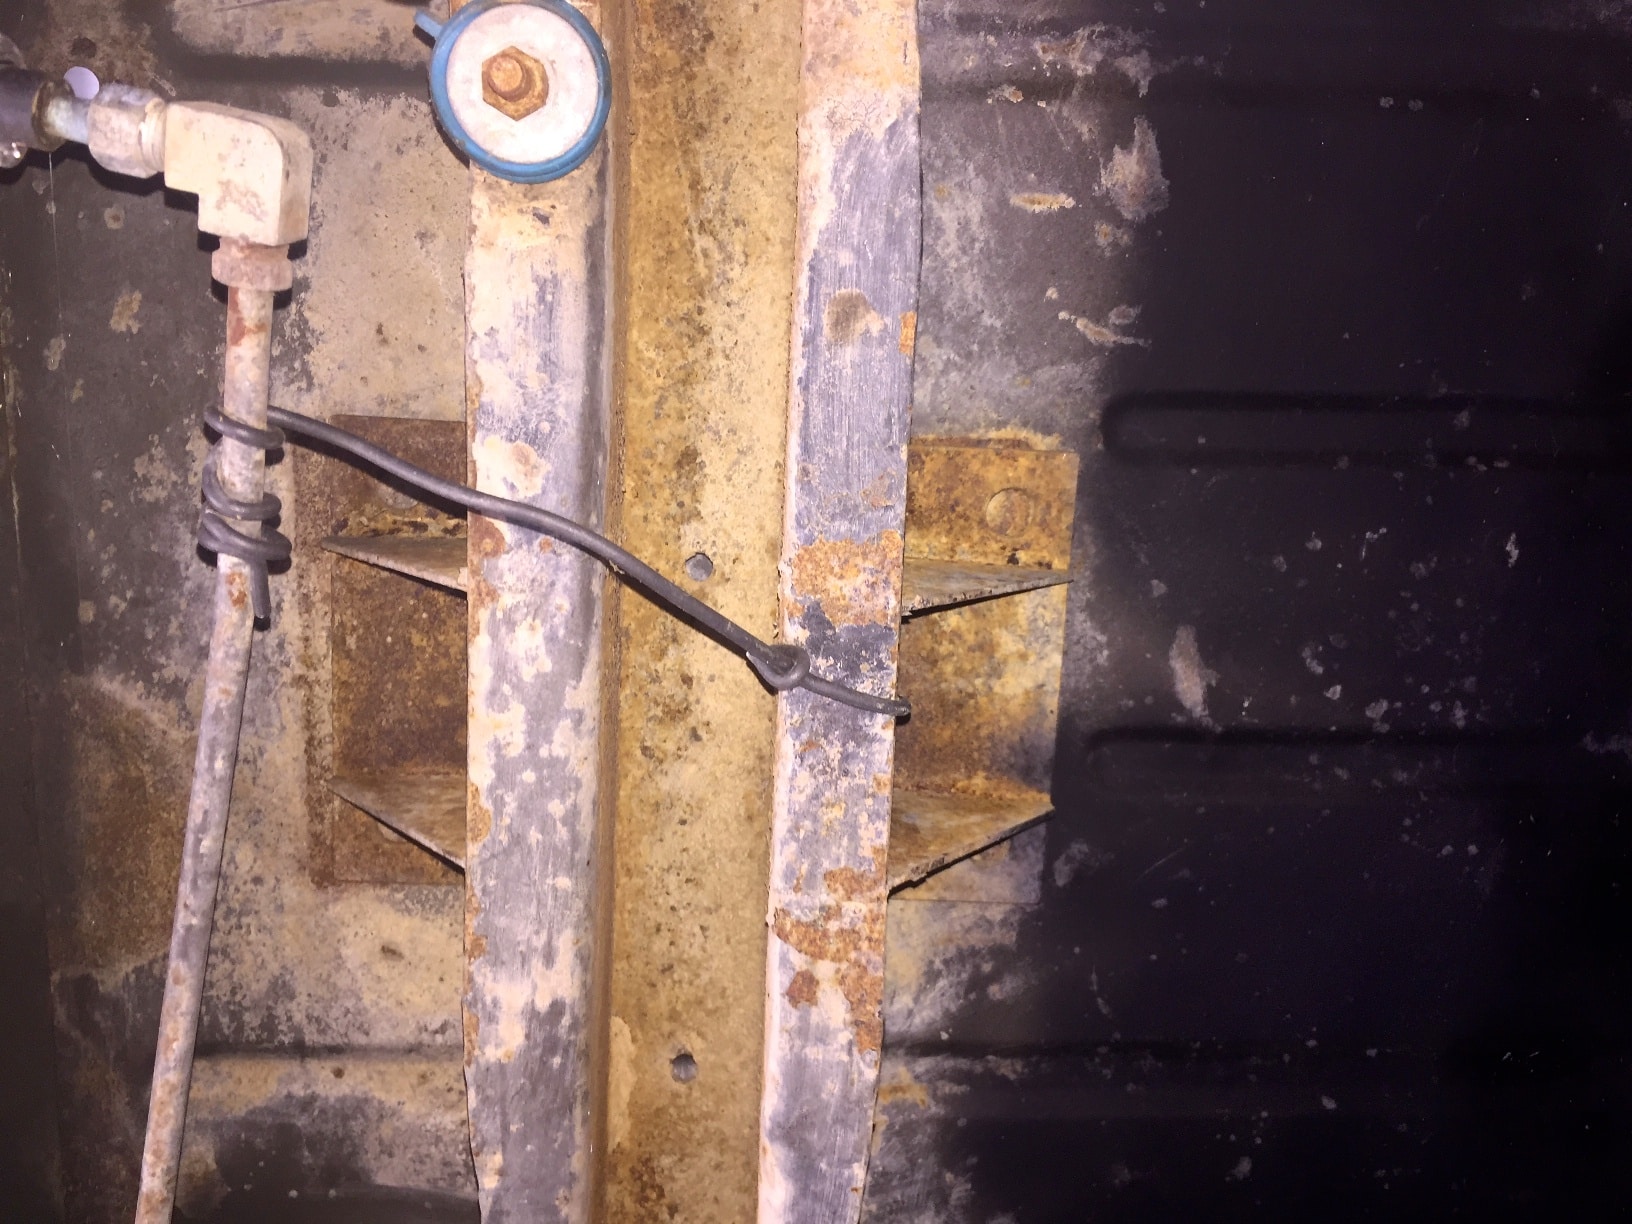
Looking from the other side, though…
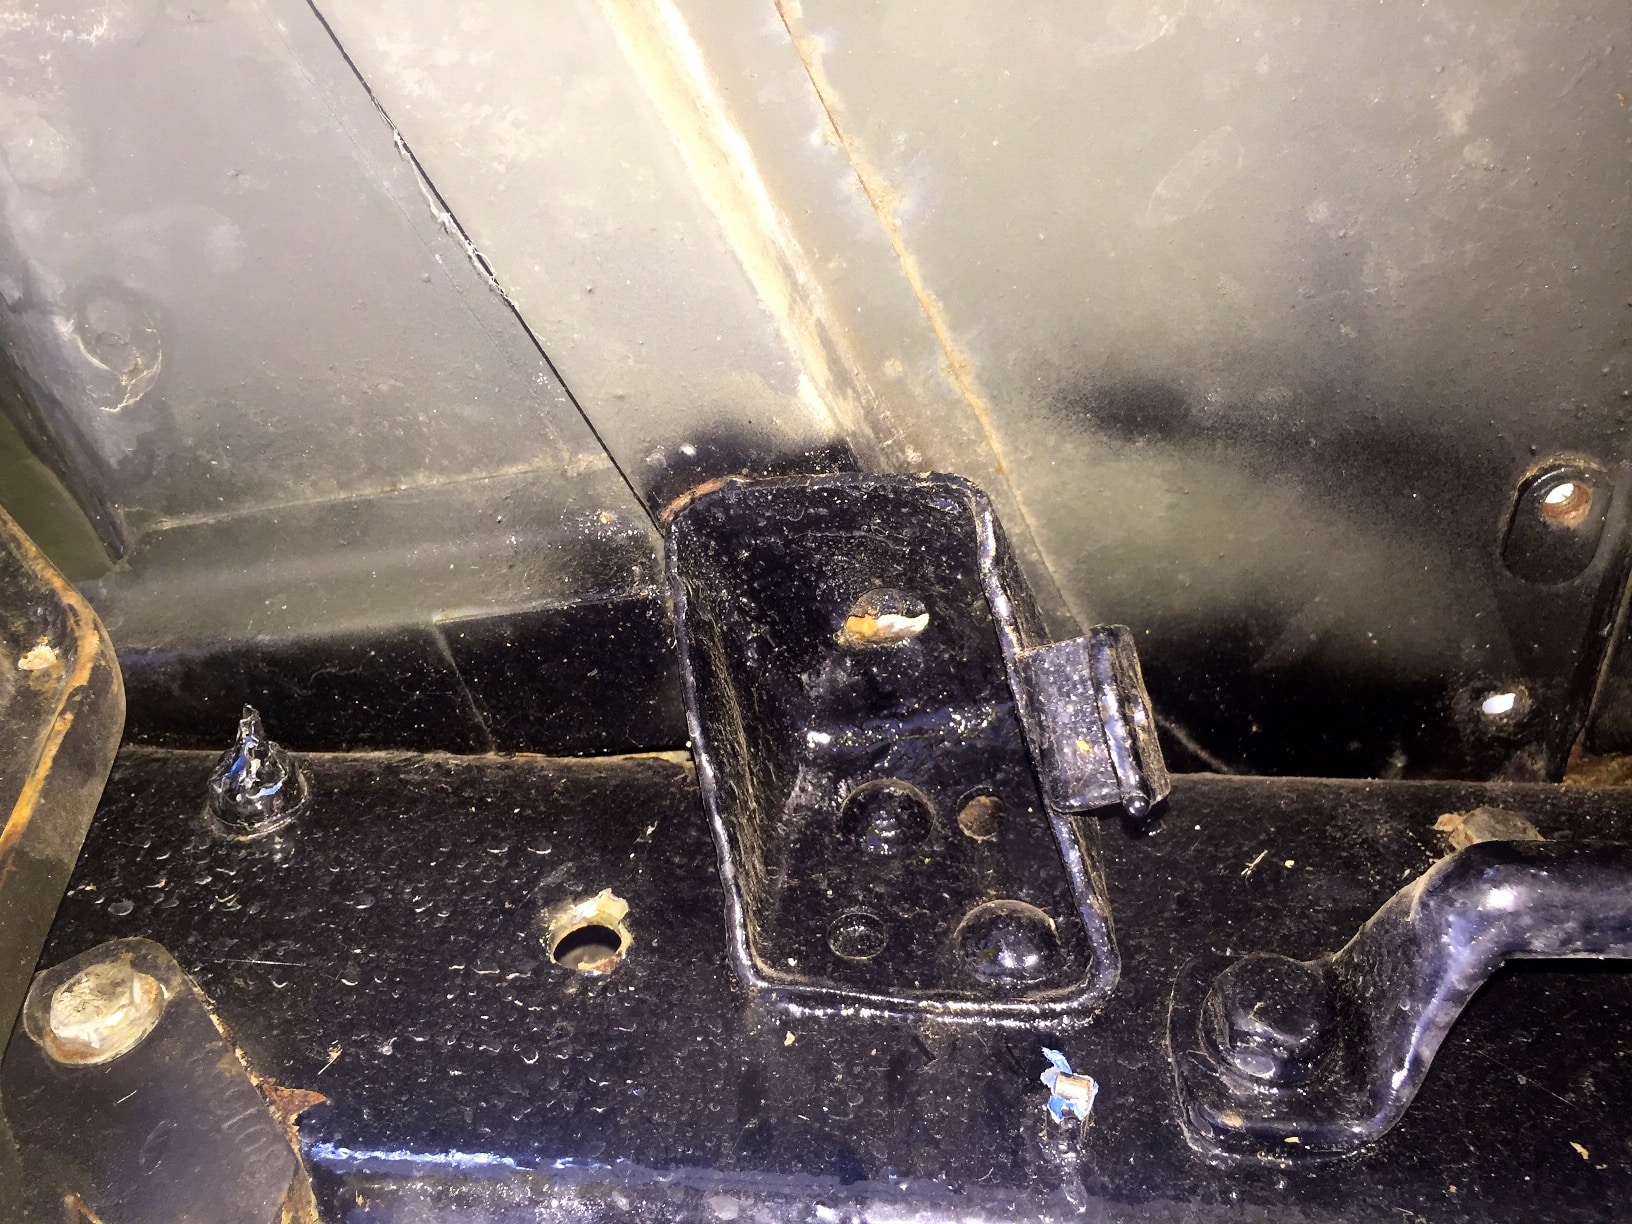
It’s easy to see how the driver’s side body has shifted forwards on the frame:

The strap that is ties down the body to the frame, shown vertical in the picture above on the passenger side is ripped completely from the body. Interestingly, there is also no return spring from the clutch arm to the body mount.
But let’s take a closer look at that body mount, shall we?
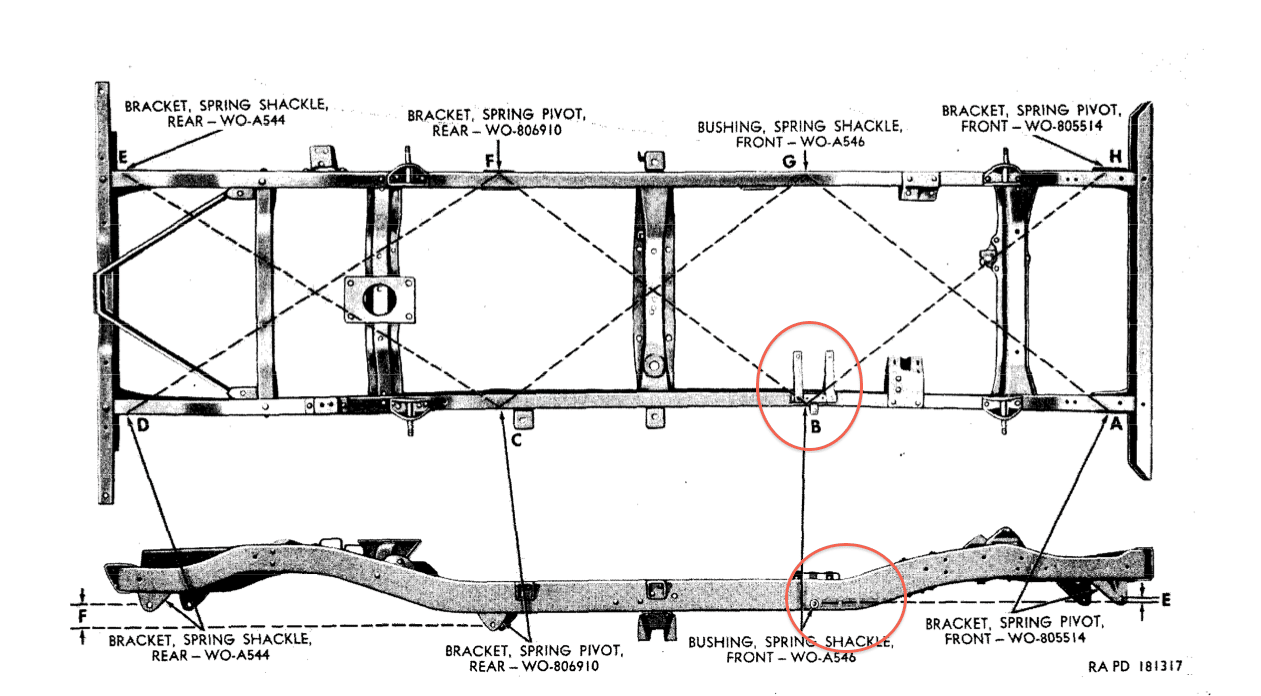
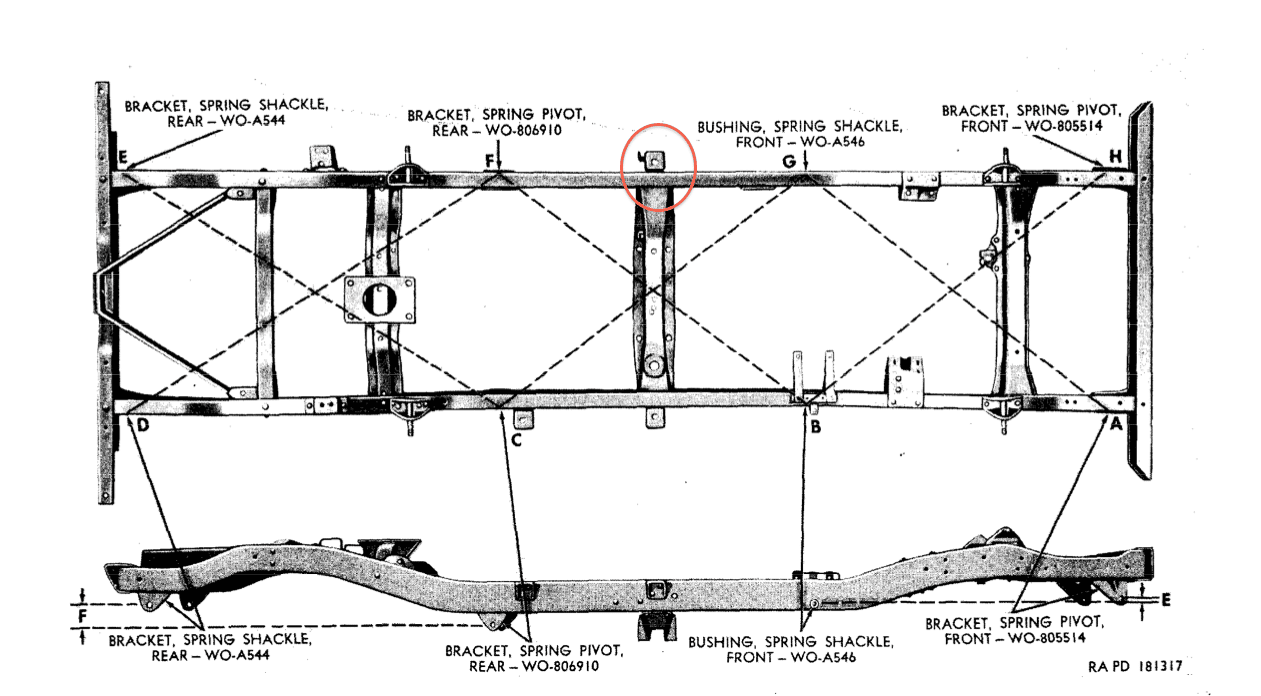
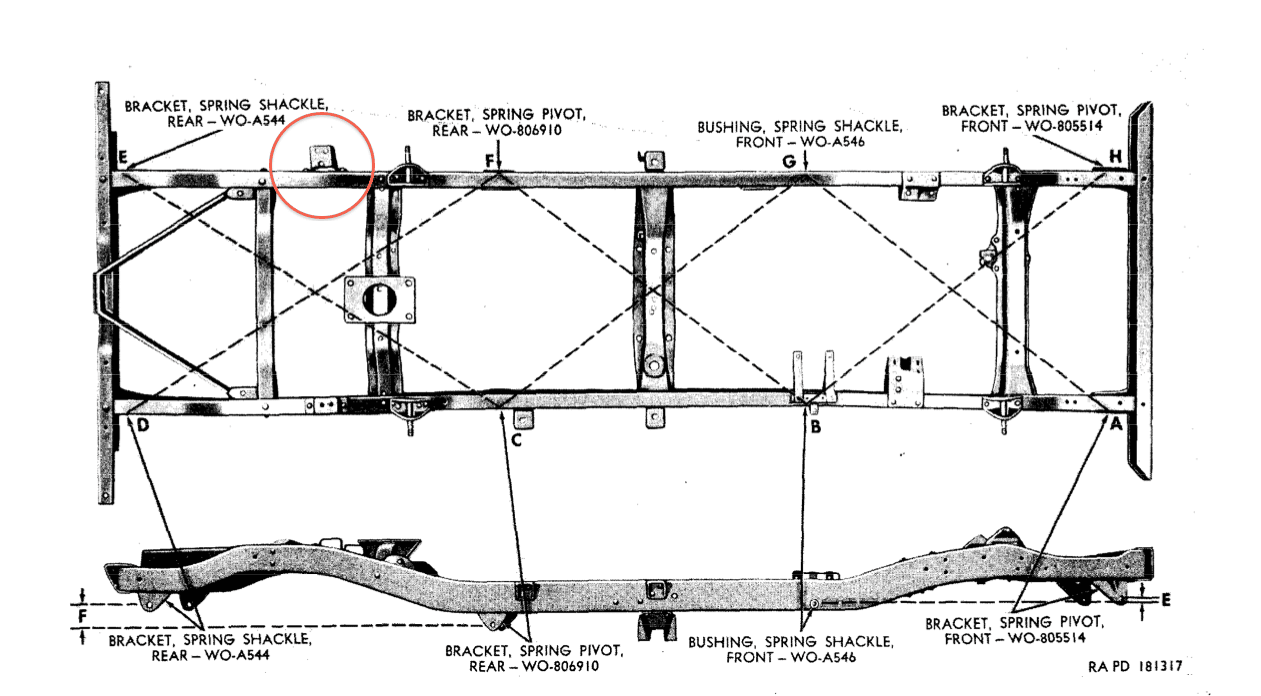
For reference, this is the part of the frame we’re looking at:
So, it was obvious that the front half of the body twisted in some fashion, and my guess is that whatever torque that caused this explains the crack in the support bracket on the passenger side.
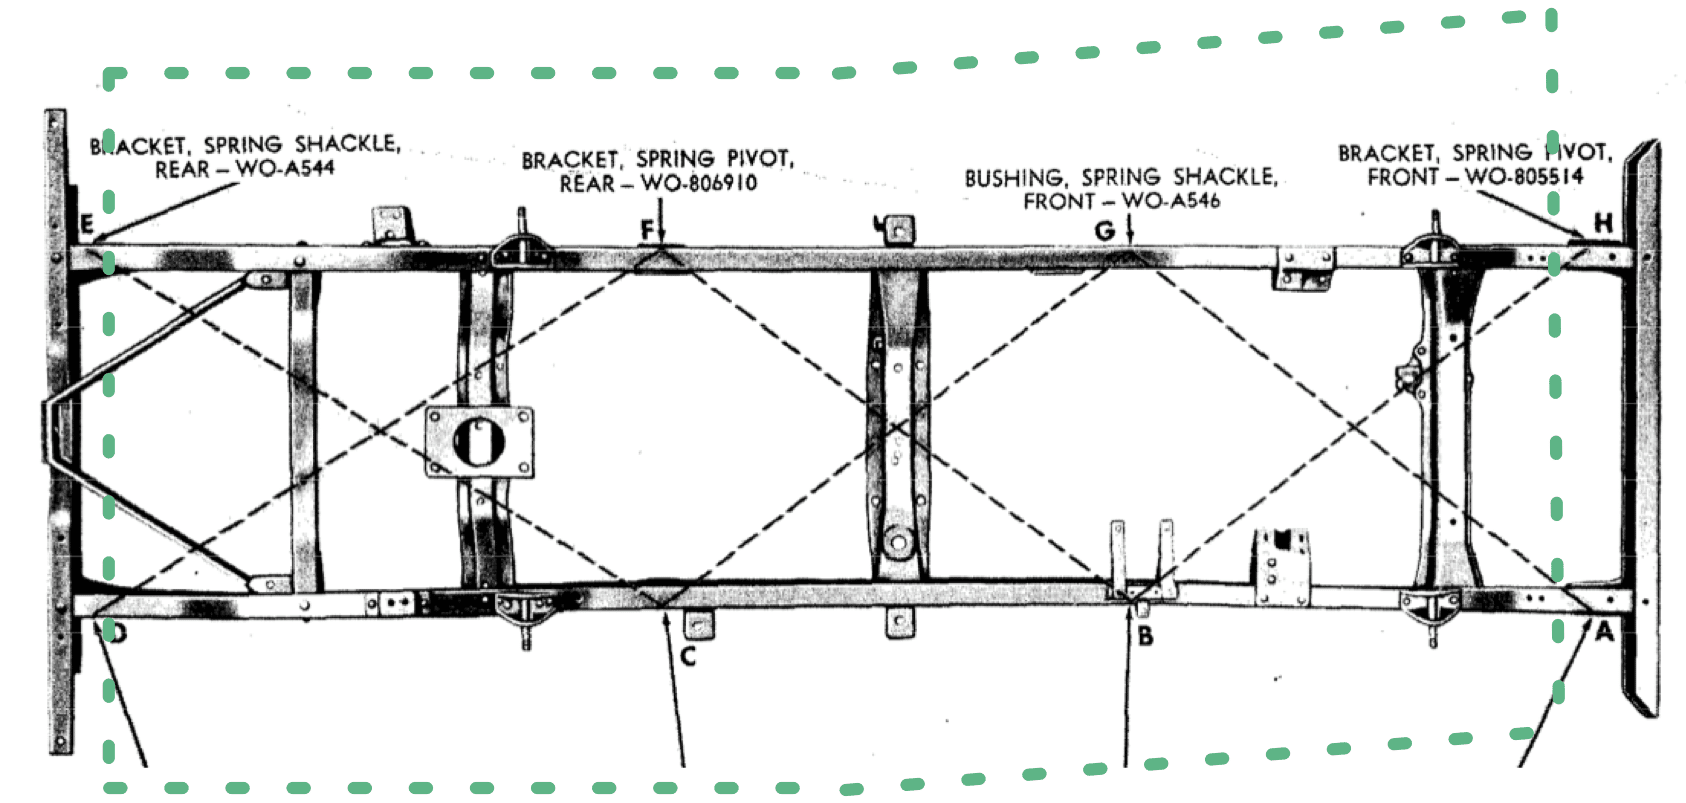
My hope was that there was something that simply caused the entire body to shift, which seems like it might be an easy fix. Looking at it from the schematics, I was hoping that it wound up looking something like this:

Because that meant that, I think, I’d be able to simply adjust the body back onto the mount points properly, weld up the bracket, and have a workable solution. However, when I looked at the back outrigger on the driver’s side..

The entire outrigger had been welded to the bottom of the body. In fact, the body mount point on the passenger side was also welded into place.

This gives me a sinking feeling in my stomach. This means that instead of a simple twist, the body probably looks something more like this:
At this point, I’m not entirely sure what the best course of action is. I do know that I don’t have the equipment to do any kind of frame or body adjustments, though the front support brace will have to be re-welded. I may just have to live with the lilt and recognize that I’m not going to make Porkchop perfect.
Emergency Brake Confusion
One of the first parts I picked up after I bought Porkchop was a repair kit for the emergency parking brake. This was, however, almost 4 years ago, but for a number of reasons (some of which were actually not things I could influence), I wasn’t able to get to it until today. Imagine my surprise to find out that things are not quite right.
[youtube=”https://www.youtube.com/watch?v=wxlhyX-4qKI”]
When I had Porkchop at the mechanic for 14 months to check on my brake work, they told me that fixing the parking brake was going to involve removing the crankshafts and all the connections up to the transmission. Not knowing any better, I believed him. (This is the same person, by the way, who left the electrical wires hanging that caused Porkchop to short out on the drive home).
Yeah, I’m still not happy about that.
So, imagine my surprise when I put Porkchop on the lift and found out that it wasn’t nearly as complicated as I was told. However, it turns out that things are not quite what they seem in the parts department.
[youtube=”https://youtu.be/vpK5V9iTiyM”]
Unfortunately, as I bought the parts from Kaiser Willys 4 years ago, and it appears that I didn’t quite get the right size brake lining, it looks like I’m going to have to do some searching to find out where to get a proper one. Thing is, as I look at the Kaiser Willys site, it looks like they are still selling the wrong size lining for the M38A1, as indicated in the video above.
[20017.05.08 Update: I called Kaiser Willys and they said that the shoes that I bought from them already have the lining installed, and that there is no need to rivet the shoe linings to the shoes. I made a comment that they should indicate on the website that the shoes already have a lining so someone else doesn’t have to make another $50 mistake. By the way, anyone want to buy a pair of replacement M38A1 emergency brake linings? Never used. Complete with rivets.]Ah Yes, I Remember It Well…
So, now that I have the workshop up and ready to go, I’m back to the same frustrations I had before. Parts that take 2 weeks to arrive, only to find out that they’re the wrong ones. Difficult-to-remove pieces. Exposed structural problems. Potentially expensive solutions.
Man, I missed this.
Comments
You say “Obviously, there has been some stress that has caused this to take place.” Some stress? That’s an understatement. More like someone hit a parking lot bollard. It takes a lot of effort to rip sheet metal that way, especially 1952 Jeep sheet metal, which is not 2016 aluminum can thin, but instead .22 bulletproof thick.
The correct solution is to pull the body, weld in new mounts, patch the rip, and put it back together. Yes, it’s a metric ton of crap work. Consider it a teachable moment (Thanks, Pres. Obama).
You’ve already stripped most of the interior (so to speak) and the fuel tank. Next step is to disconnect the electrical. Take a photo of every connection before you remove it, then label each wire. You only have to disconnect where the wiring crosses from the frame to the body. In the rear, that’s just the tail lights, which have bullet connectors, so that’s easy. In the front, it’s all the wiring that passes through the firewall to the engine compartment (ignition, lights, etc.). Given what a pain it was to get everything wired in to the instrument panel, I’d suggest disconnection at the far end.
You’ll then need to remove the steering wheel, gear box tower, and pedals.
Finally, unbolt the body, and cut off the welded tabs.
When you’re ready, put the lift arms above the jeep, and suspend chains or straps from the lift arms to the body, and hoist.
Roll the chassis out of the way, and lower the body.
Now it’s time for a good powerwash of the chassis. Reweld new mounts where needed. Patch the body (or have someone do it for you). Check the chassis (and body) for straightness.
Then put it back together.
Well, I know that’s the correct solution, but is it the required solution? I mean, Badger was supposed to be the show-quality Jeep (and still is), and Porkchop was always supposed to be the tooling around option. Supposing I don’t want to get it pristine, would it be okay to patch it? It’s a genuine question. I wasn’t looking forward to having two frame-off restoration projects going at the same time.
Repair, restoration, or show-quality restoration?
The ripped metal is prone to corrosion. The tweaked misalignment between body and frame means everything that penetrates the body is misaligned, and will have interference and rubs. The missing clutch spring may be because it no longer fits properly due to the misalignment, etc., etc., etc.
You are planning on taking this offroad, yes? Remember, these are flexible flyers. They will twist. You run the risk of a twist ripping the sheet metal or body mounts even further. More importantly, additional twist could cause binding in the gas, brake, or clutch pedals, any of which could be critical to your continued breathing.
I’m not suggesting you do a complete frame-off restoration – just that you fix the issue.
It’s ok to hack and patch the body. It’s ok to hack and patch the body mounts. But getting everything lined up again will make it a much safer and better vehicle.
All fair points, and while it’s not what I *wanted* to hear, I’m glad that you said it.
Pingback: Eastwood Tools Cybersecurity Fail – J Metz's Blog