
There was a very interesting question on Quora that wanted to know what the “Fastest way to move files between two Synology Diskstations.” I started writing a response to the question, but then realized that it might make for a very interesting tutorial.
Why Do This?
This is ultimately the question that needs to be answered, and at the end of this article you’ll see how much something like this can actually matter.
Let’s suppose you have two storage devices and you want to move information from one to another. It doesn’t matter if it’s a Synology, or a QNAP, or FreeNAS, etc., because when you have any two devices that you connect to your computer, copying files work the same way.

In fact, using this method is probably the way that most people would think that moving data around should be done. After all, easier is better.

Drag-and-drop = Easy!
You’ll notice that in the screenshot above, the path is on my computer’s Desktop. This means that when I drag and drop, this is what’s happening:
Copying a file to the DiskStation
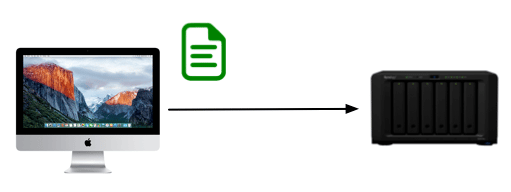
So, when information is on one Diskstation (or attached storage device), and we want to move it to another device, we think we’re doing this:
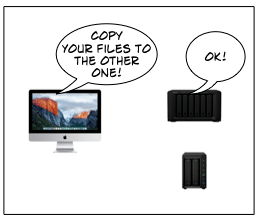
Once we click on a file (or set of files), since we’re looking through our desktop at the devices, this is what it might look like is happening:
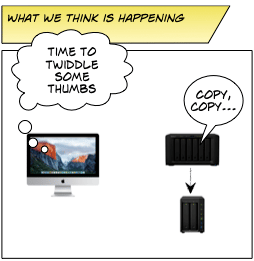
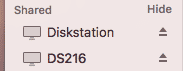
But what people may not realize is that when you have two remote devices (like “Diskstation” and “DS216” in the screenshot above, moving a file from one machine to another is not quite so straight-forward. In reality, this is what is actually happening:

So, to put it into plain English, when you use your desktop (true for any desktop machine1) to copy files from one diskstation to another, you are actually doing more than one copy. Behind the scenes, files are being copied to your desktop, and then copied to the second device.
Why is it doing this? Because the desktop (in this case, the Finder) is managing the files to make sure that each one is moved correctly. Because it’s got that responsibility, it has to “touch” each file in the process.
So, what if we want the two Diskstations to talk to each other, and not go through this intermediary process?
Getting The Diskstations To Talk To Each Other
Okay, this is not really a problem if you have a small number of files that you want to move, or if the files themselves are small. But what if you are doing a full-on migration from one system to another (which, as it turns out, I’m going to have to do pretty soon, but that’s a subject for a different discussion).
In this case, it should be faster and more direct to have the two Synologies (Synologys? Synologi?) talk to each other – right?
So we know what we have to do, let’s take a look at how. Note: There are a couple of ways to do this, so your mileage will vary.
Some items of note before we get started, because understanding the bigger picture will come in handy.
- My example here is focusing on migration (or copying) of data, not Backup. I recommend you look at my Synology Backup series for more information about doing that.
- The devices that I’m using as an example are on the same network, and the same subnet. This process can be used over the Internet, but at much, much slower speeds. This will deserve its own post later on.
- I’m going to be paying very close attention to showing you where I am, from both the Finder and Diskstation perspective. I’m doing this so that you can gain some familiarity with locations and how they may look, because when we start copying things around everything can look pretty similar.
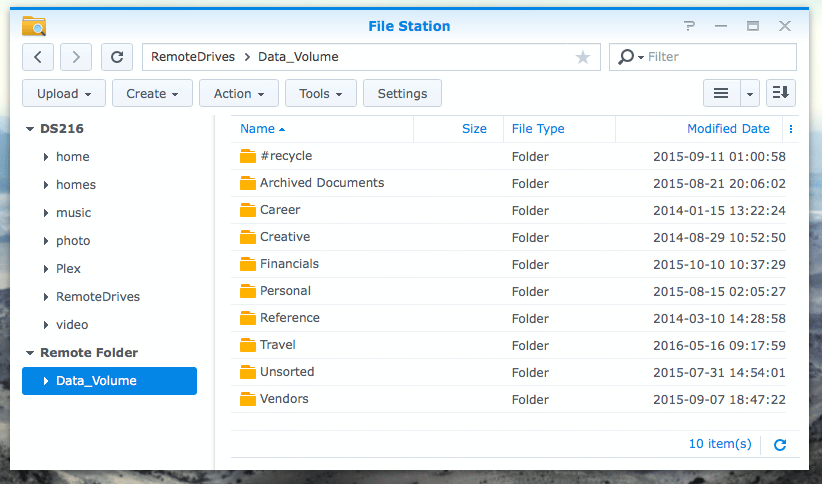
I’m assuming you’ve created folders on your Synology before, but just to make sure we’re all on the same page, let’s take a quick look at my DS216+ to get our bearings.
From the Finder, I can take a look at the directory structure of my DS216+, and it looks like this:

From the DS216+, when I click on “File Station,” I can see the same directory structure – as expected.
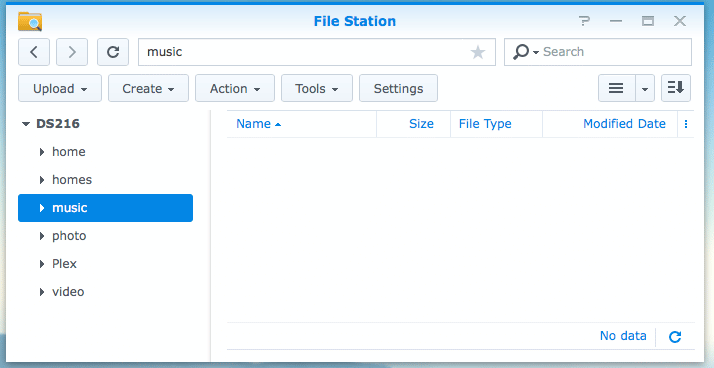
No surprises here.
Now, the list that you see on the left aren’t just folders. Synology calls them Shared Folders, and it’s an important distinction. You can see this when you take a look in the Control Panel under Shared Folders:
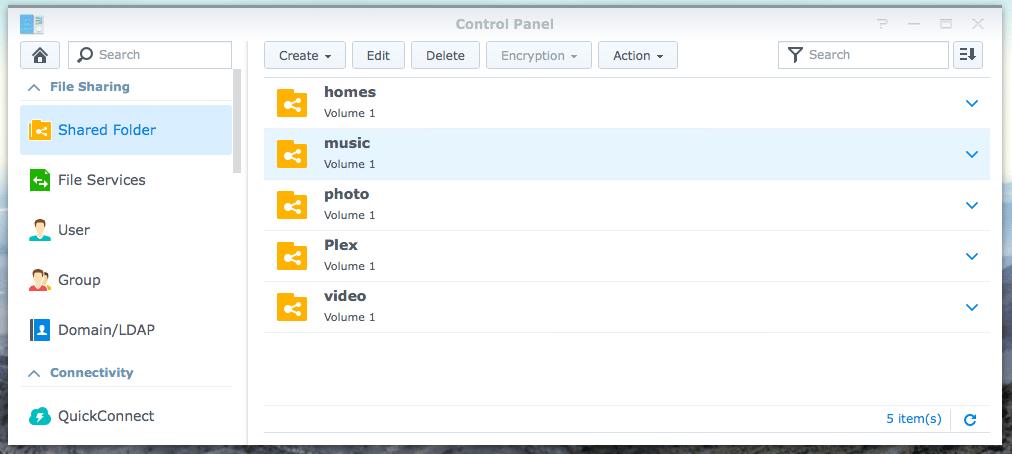
DSM sees this as a special kind of folder
In this case, we’re going to keep things simple. I have some music that I want to copy from my Diskstation to DS216+. To do this, I created a shared folder called “RemoteDrives” from inside the “Shared Folders” section of the Control Panel. Why there? Because as good as DSM is, there are many ways to do this, but I’ve found that I get fewer problems when I do things in the correct “place.”
So, as you can see in the image below, now we go back to File Station on the DS216+, select the RemoteDrives folder, and use the Tools button to add a remote folder:

Drop-down menus under “Tools”
One quick note on the reason why I created an additional Shared Folder. When you mount a remote folder, it has to go somewhere. It doesn’t simply show up in this list of Shared Folders on the left (because, to DSM, these are the shared folders that it controls on the local device. That means that when you mount that remote folder, it has to go inside one of these folders available on volume1.
In this case, I didn’t want the remote folder to show up in any of the others, so that’s why I created the new folder specifically to handle directories that weren’t local. In other words, it helps keep things separate and clear in my own head (’cause I get easily confused). It’s also the reason why I named it “RemoteDrives,” in case I want to mount some other directories from other storage devices. This is not a DSM or Synology requirement – this is my own best practices for knowing when I’m dealing with local or remote data.
Now, if you look in the screenshot above, it gives you the option to select a shared folder using the CIFS protocol, or NFS protocol.
Shudder!
Shame on Synology for calling it CIFS! There are two reason for calling them out on this. First, Microsoft doesn’t support CIFS any longer, and SMB is the proper usage of the term. Second, even Synology uses SMB! So, if you start looking for CIFS in the Control Panel, you won’t find it. Instead, you’ll see something like this:
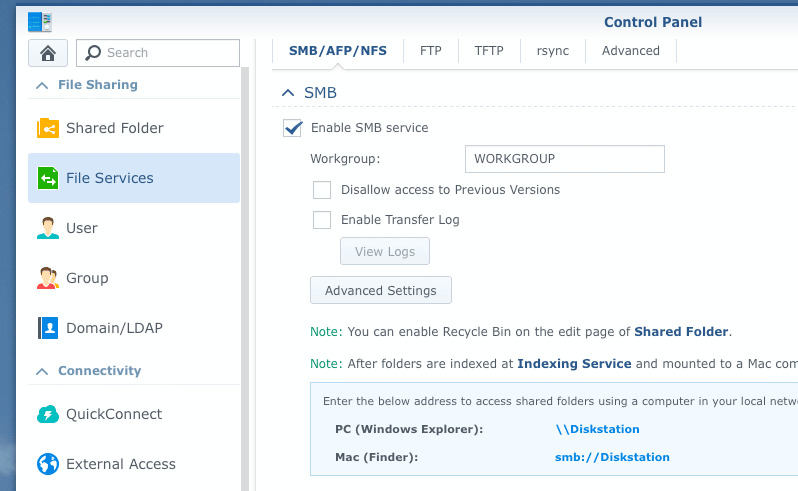
On the Diskstation: No CIFS!
In this screenshot, you’ll see that in order to access the Diskstation to mount the volume in the Finder or in Windows explorer you can use the shortcut – but that is not what we are doing. We are attempting to get the Diskstation devices to talk to one another, and as a result there is a different way that we have to connect.
For my purposes, as you can see, my Diskstation is using SMB to share across the network. That means that on the DS216+ I’ll have to choose the “CIFS” connection type. When I do I get the following dialog box:

Pretty standard stuff
Now, it may seem “obvious” that we should use the instructions in the Diskstation Control Panel, right? Well… not quite.

So, that didn’t work…
So, if you find yourself with an issue like this, you can (and probably should) use the direct IP address to get to the device2:
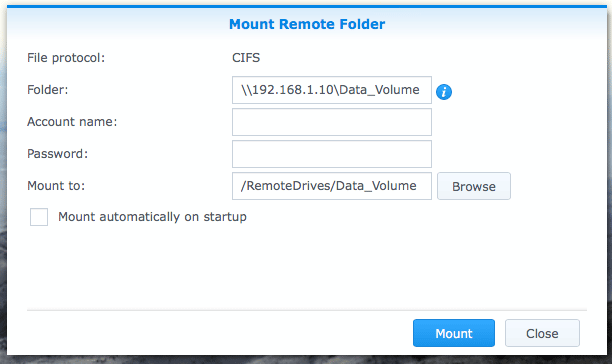
The full path to the remote folder
Let’s break this down a little so that you know what it is that we’re typing in here.
192.168.1.10: the IP address is the location of the Diskstation on the network
Sidebar
In making this blog post, an interesting thing happened. When I attempted to mount one of the folders, I got an error that the path could not be found. So, I had to enter in the “volume1″ directory in the path, so that it looked like this:

What’s “volume1”?
volume1: This is the volume that exists on my Diskstation where the folder resides:
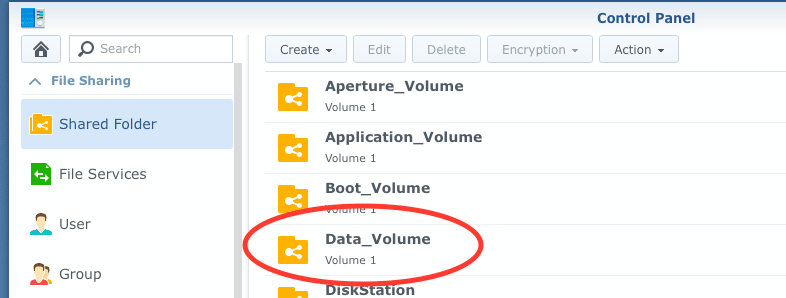
Folder “Data_Volume” is located on volume1
If my Diskstation had more than one volume set up, you would see volume 2, volume n, etc. As it is, there is only one volume, and the folder called Data_Volume.
Then, interestingly enough, when I switched to using the “Data_Volume” shared folder, I no longer needed “Volume1” in the path.
So, here’s my advice to you: Keep it simple. If you can get away with the IP address and the shared folder you want to mount, go for it. If you get an error, try adding in the “volumen” path and see if it works for you.
Back to the Example
Data_Volume: This is the name of the folder on the volume that I want to get to. In the image directly above, if I wanted to go to Application_Volume, or Boot_Volume, I would enter in those names (capitalization counts) here instead.
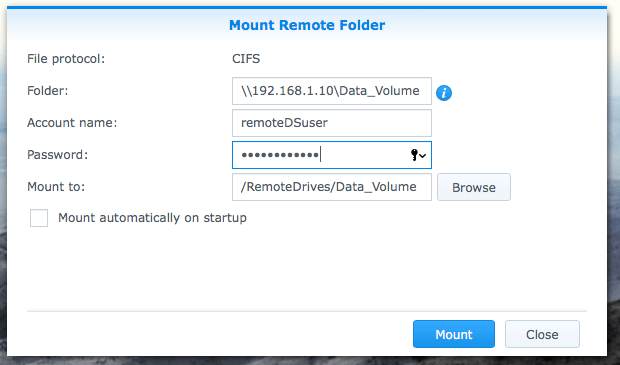
Make sure you use the remote user account that can access the folder
Account Name and Password: This is the account for the remote Synology, not the local one. Make sure that you use a user account that can access the shared folder. If you’ve set up multiple users for your Synology, and you don’t have the right permissions set up, you won’t be able to access it using that account.
Now, you’ll notice that at the bottom of the screenshot the field “Mount to:” is filled in. In this case, I had the RemoteDrives shared folder selected when I clicked on the Tools button, so it auto-populated that field for where the mounted folder is going to be. If you want to change the location, you can click on Browse, to choose another Shared Folder in the list:
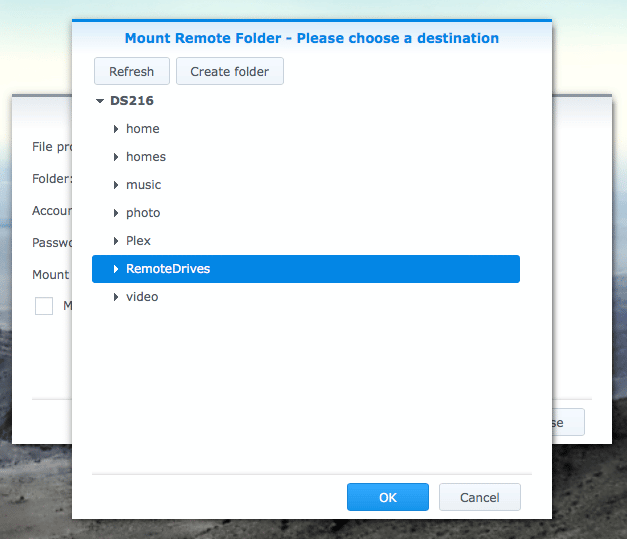
Shared folders or subfolders
When you select a different location, however, the auto-populated field is replaced with whatever you select. Because I want to keep things easy for myself, I’m going to keep the naming the same as the remote device. For me, “RemoteDrives/Data_Volume” is descriptive enough to know that I’m looking at a folder called Data_Volume on a Remote Drive.
When you click on mount, a folder with a “network link” icon shows up in the shared folder. The screenshot below shows what the DS216+ looks like after the folder has been mounted:
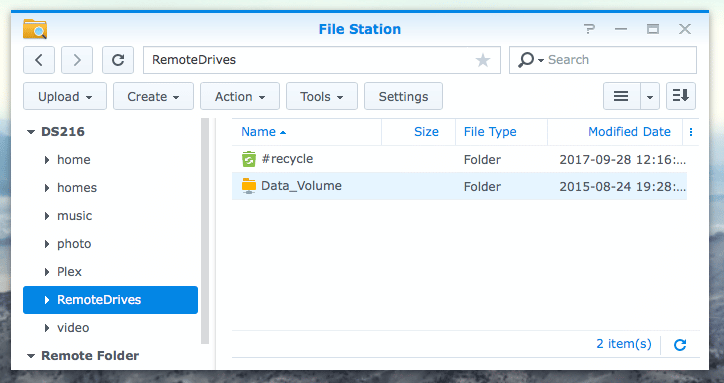
You can tell this is not a local folder because the icon has changed
You will also notice a new drop-down arrow at the bottom of the list on the left hand side, called Remote Folder. Clicking on it reveals the contents of that folder:
The contents of the remote folder in the *gasp* remote folder list!
It’s important to note that the Data_Volume listed in the Remote Folder and the Data_Volume listed in “RemoteDrives” are the same folder. If you try to do something silly, like copy a directory or file from one into the other, DSM politely tells you that you can’t do that:
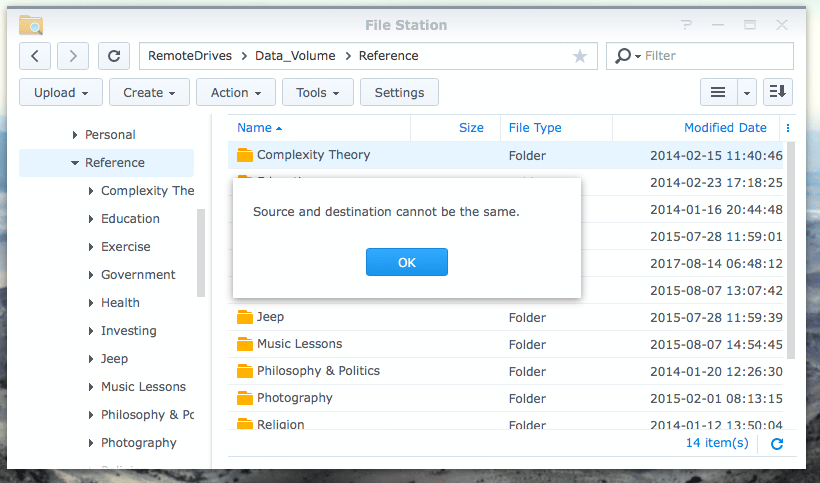
Doh!
That means that you will need to use (or set up) a local folder on the Synology to be able to receive the files from the remote device. But, you knew that already, yes?
Copy Away!
Now that we have the drive mounted, we can copy away. Clicking on the File Station icon will open up another window, much like having two Finder windows open, so you can drag and drop from one to the other.
There is one more thing that you need to know about the copying, however. The first time you do this, you will be presented with an option of how you wish to copy files over.

Decisions, Decisions…
Right now, I don’t have anything in the receiving (local) folder, but if I did DSM wants to know what to do. This is not a versioning system, so DSM wants to know if files with the same name (whether new or old) should replace what’s there, or if you just want to skip over the copy. Overwrite will force a copy, which means that if you have a lot of items already there that you are intending to shift over, you’ll be doing a lot of extra work if nothing has changed. If you want to skip over the items, you may actually skip items that have changed, but have the same name. Obviously, the trade-0ffs can only be determined by you.
If you don’t select something now, you’ll get prompted when you make the copy directly:
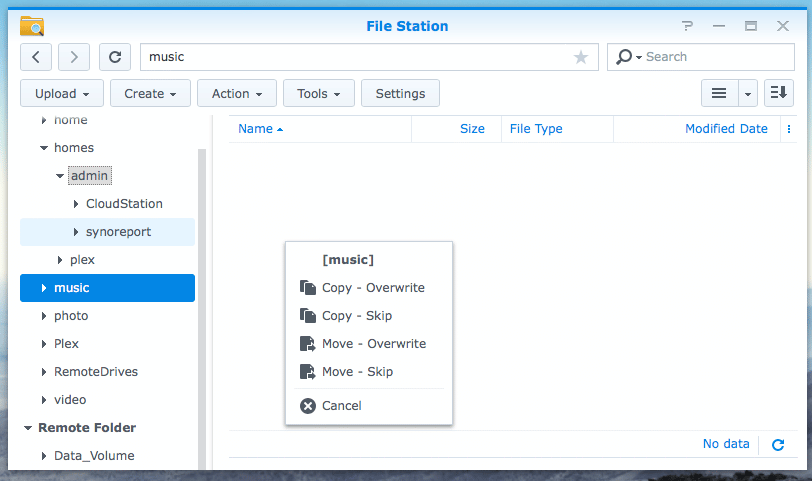
You can make the decision on the fly
When I moved over 2.7GB of data from my Diskstation drive to my DS216+ drive, using a direct connection, I got pretty decent speeds:
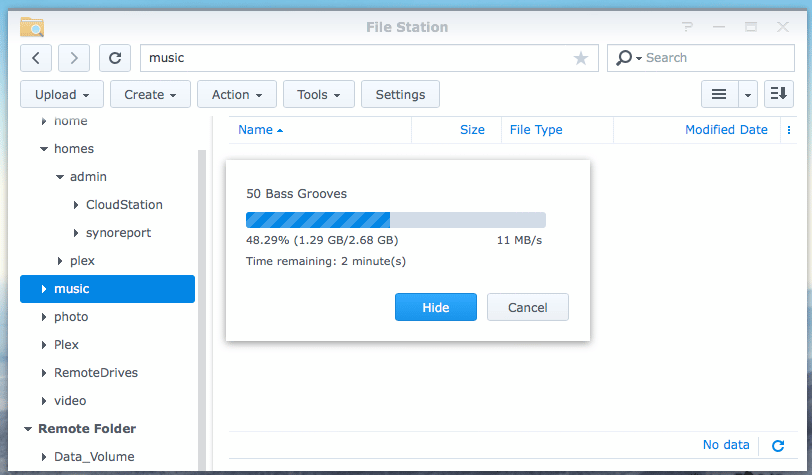
Not too shabby
Is It Better?
By way of comparison, I made the same copy of the same folder to the same location, using the Finder (same folder, from Diskstation to DS216+. Sadly, the Finder didn’t give me a speed rating (of course), so I ran the comparison (un-scientifically) by time. I ran a couple of different time tests:
Large video files (2.65GB):
- Synology-to-Synology: 4:57 (4 minutes, 57 seconds)
- Using the Finder: 4:44 (4 minutes, 44 seconds) (-:13)
- Wifi Laptop: 19:39 (19 minutes, 39 seconds) (+14:42)
Large Zip File (1.65 GB)
- Synology Direct: 2:21
- Finder: 2:22 (+:01)
- Wifi Laptop: 9:27 (+7:06)
Lots of Small Files (1.65Gb)
- Synology Direct: 5:04
- Finder: 5:54 (+:50)
- Wifi Laptop: 17:10 (+12:06)
Okay, so why the discrepancy? And what can we take away from this?
“Data” is not one, monolithic entity, and moving it around means that there are a lot of things going on – there are many moving pieces.
First, there is the network. My computer is also on a 1GbE network, connected to the same switch (not using wifi), so this is pretty much a straight-forward comparison of what happens when the network is the same. If your computer is using wifi, however, you will likely see a much greater difference, like what we saw with the laptop on wifi (with great signal, but there is the additional hop to get from the wifi router to the switch to the Synologii as well). Moreover, it had to do it twice for each file (once over the wireless network to the laptop, and one more from the laptop to the destination folder).
Second, there is the processor speed. The DS1511+ is the key limiting factor here, but neither Synology’s CPU can hold a candle to the 4.2Ghz Intel Core i7 that the Mac has. The Mac also has 64GB of RAM, which means that the buffering size can have a decent impact on storing large data (like video files) for moving around. You’ll notice, however, that those big numbers didn’t mean much when moving lots of small files around.
Third, these tests were done when there wasn’t much else going on, but there was still some stuff happening. That is, I wasn’t running too many additional programs on my laptop or my desktop, but there are some applications running on the Synologii (I did try to shut down as many applications as possible, though, to keep it as even as I could). So, if the CPU for the Diskstation is doing transcoding, or serving up multimedia, or other kinds of things, that will also affect the performance. That’s why I said that these tests are not scientific, and you should take them with a grain of salt.
Bottom Line
 You’ll note that I did not decide to test moving 2GB of data from the Synology to a USB stick. Part of the reason for this is that I really wasn’t sure if it was going to be any faster, when you consider the time it takes to mount, unmount, switch to the other diskstation, mount, and copy. It certainly wasn’t going to be more convenient. My Synologies (what is the plural, anyway?!) are inside the data closet, connected to my 1Gb switch in a fixed fashion, and the USB ports are not conveniently accessible. Even so, I have to confess that with the excessive time it took to do the wifi copy, it might have been faster just to use the USB sneakerware option and be done with it.
The answer to the question – which is fastest – is difficult to answer because the type of data being moved can cause a lot of variance in the outcome. If you are connecting to your Synology devices via a wireless laptop, obviously you are going to pay the wifi penalty for copying data. In that case, you’ll probably want to consider using the direct-connect method. If, however, it’s too much of a pain in the butt, then if you have a wired connection for your desktop machine, the small variance may not be worth setting up the shared folders on the Diskstation.
However, if you are migrating from one Synology to another, then the direct method will certainly be the fastest and most straight-forward way to accomplish your goal.
- Advanced versions of NFS and SMB have the ability to do “Server Side Copy,” which omits the need to have something in the middle. However, most desktop environments don’t have this ability built in.
- Note: If you are attempting to do this over the Internet, there are some additional options, but as I said this will require a completely separate post.