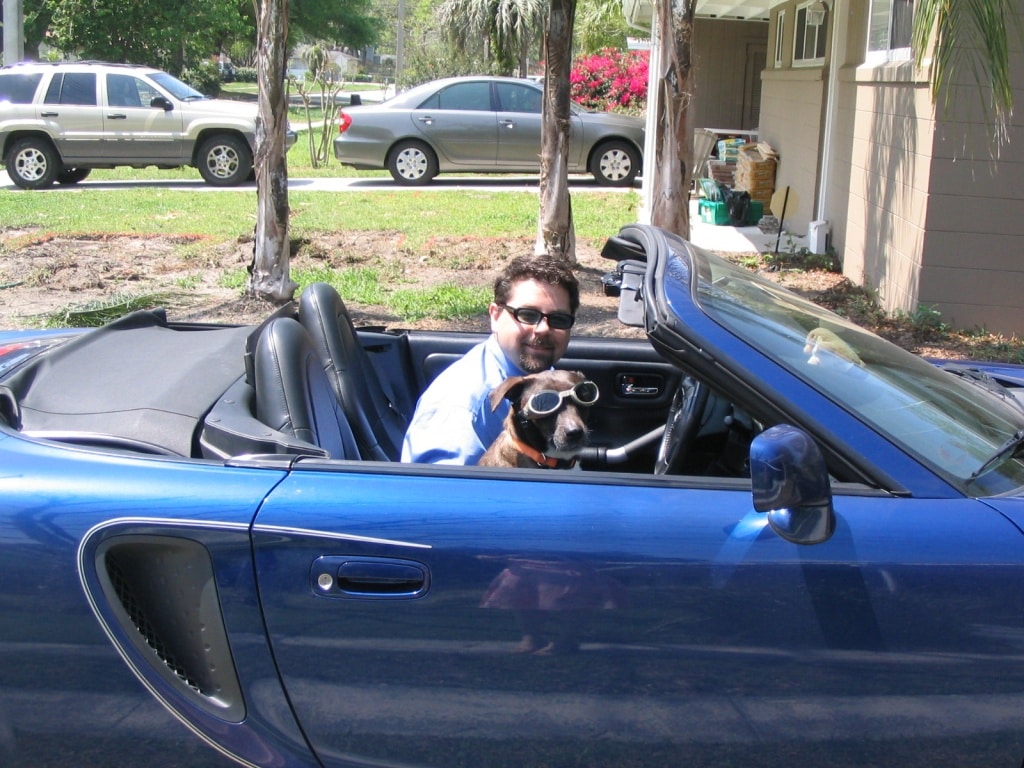
I’ve been doing some work on the MR2 lately, mostly because I’m still excited about having gotten it back. I can’t believe how much a car can mean to someone (I think a lot of it has to do with it being so much fun to drive with Simon, and there’s a bit of nostalgia in that, too).
The car still looks gorgeous, even after 18 years, but I think there are some things that can be done to improve it.
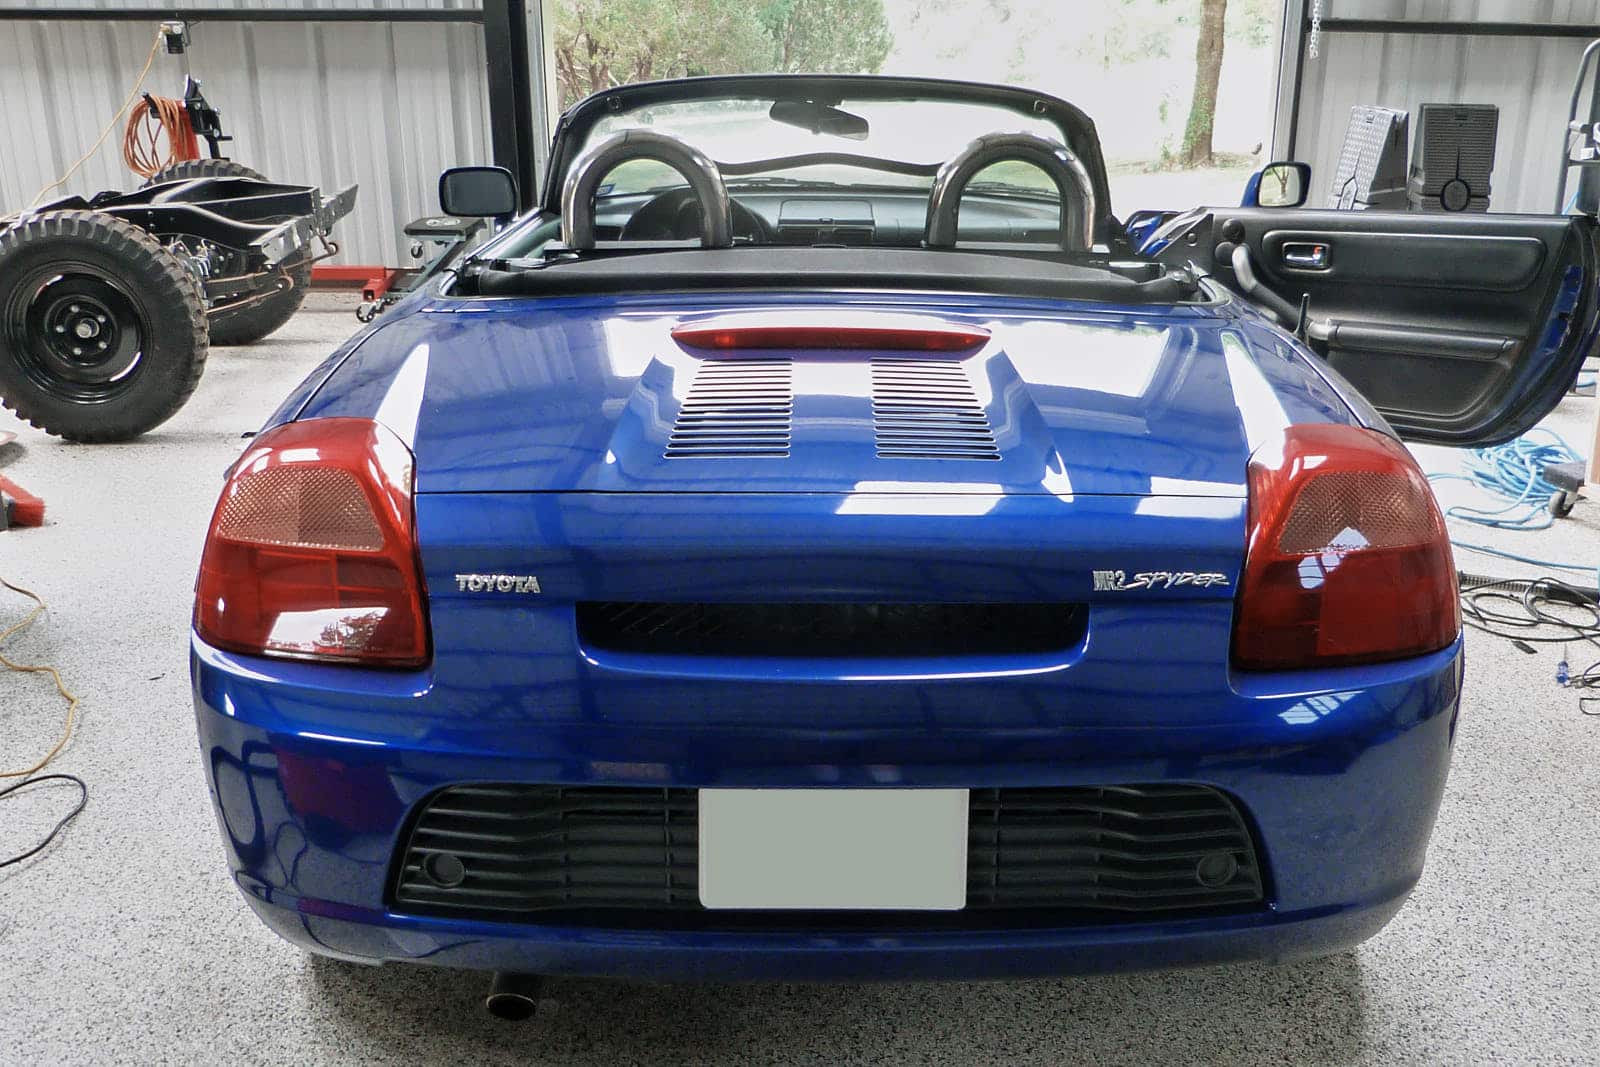
This time, I installed a new “loop bar wind deflector,” a cosmetic change that hopefully will help spare the wind whipping around a bit better than the stock plastic piece.
In case you wish to do this yourself, this is a better installation guide than the one that came with the part.
The Purchase
Unlike buying parts for the Jeeps, getting parts for the MR2 Spyder has been something of a challenge. There are a lot of small vendors out there, and the quality is all over the map. You really need to do your homework, or else you’re going to be stuck with something that you don’t actually want, or worse.
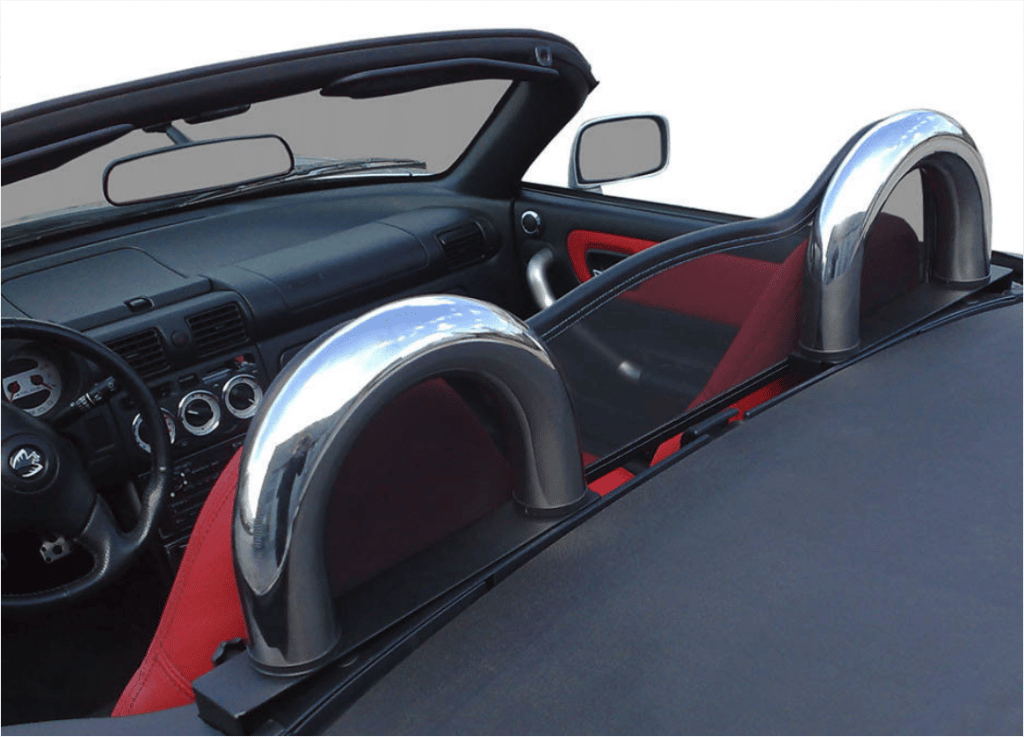
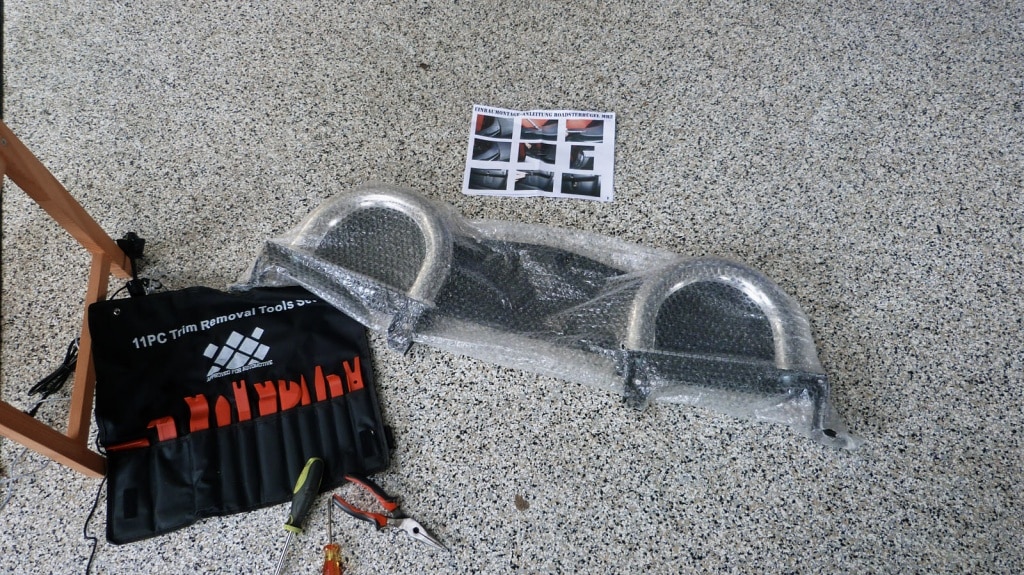
As usual, eBay is your friend. I found what I was looking for relatively quickly, and the vendor feedback was 99.6% positive (and still is, as of this writing, though it appears they have pulled everything from their eBay store for some reason). With the choices, I was looking for something relatively low-key, and that’s why I got this:
The only thing that I was concerned about was the fact that they are in the Netherlands, but I needn’t have worried. Even though they were across the puddle, I received the part in around 5 days. I find that really impressive.
Installation
In theory, you really don’t get much more simple than this. The box came with the part and a 3-page printout of word-less instructions.
One issue, though, is that the instruction sheet refers to a part that is slightly different than the actual part itself. This becomes a larger issue later on in the installation process, but I’ll get to that in a moment.
The model of the loop style bar had the wind deflector attached. It was possible to get the bars separately and the wind deflector separately, but the price seemed comparable to buying them all together as part of the package. I thought that the wind deflector could be removable, but it turns out that it can’t.
According to the description of the product, the deflector “can remain in place when not in use or be stored away in the optional protective storage bag.” However, the wind deflector’s attaching bolts were welded in place, making that impossible (and the part awkward to install – two people were needed for the actual attachment to the car).
The pictures were generally follow-able, if a bit dark at times. The instructions implied that you can remove the loops from the wind deflector and install them separately, but since the deflector was welded on, some improvisation was necessary.
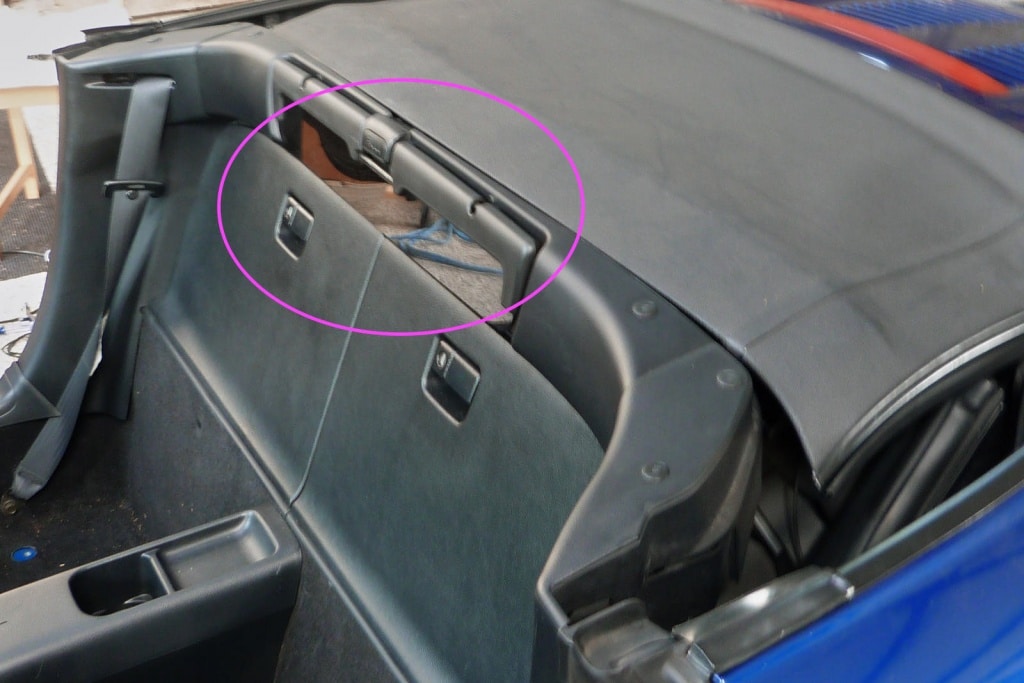
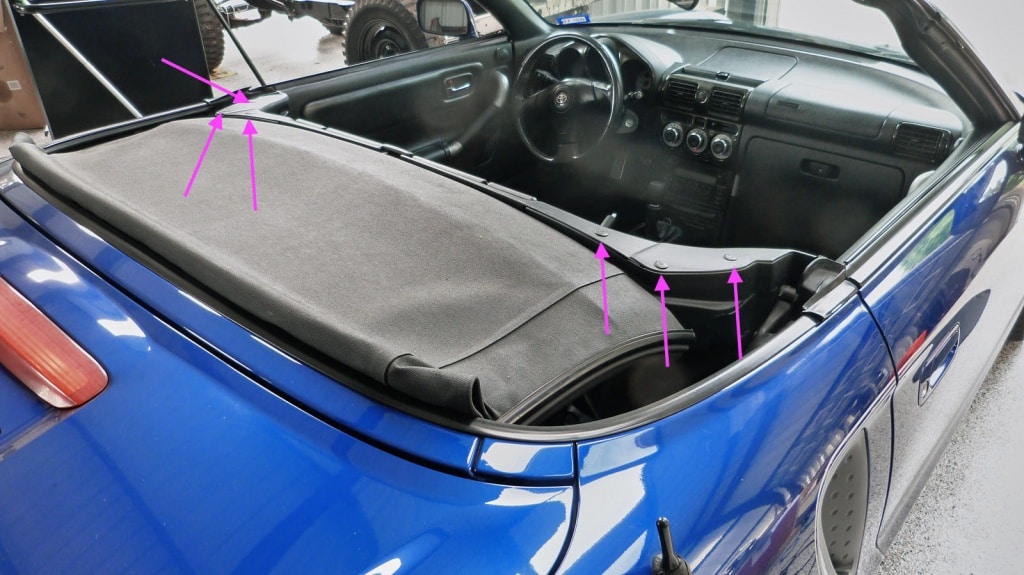
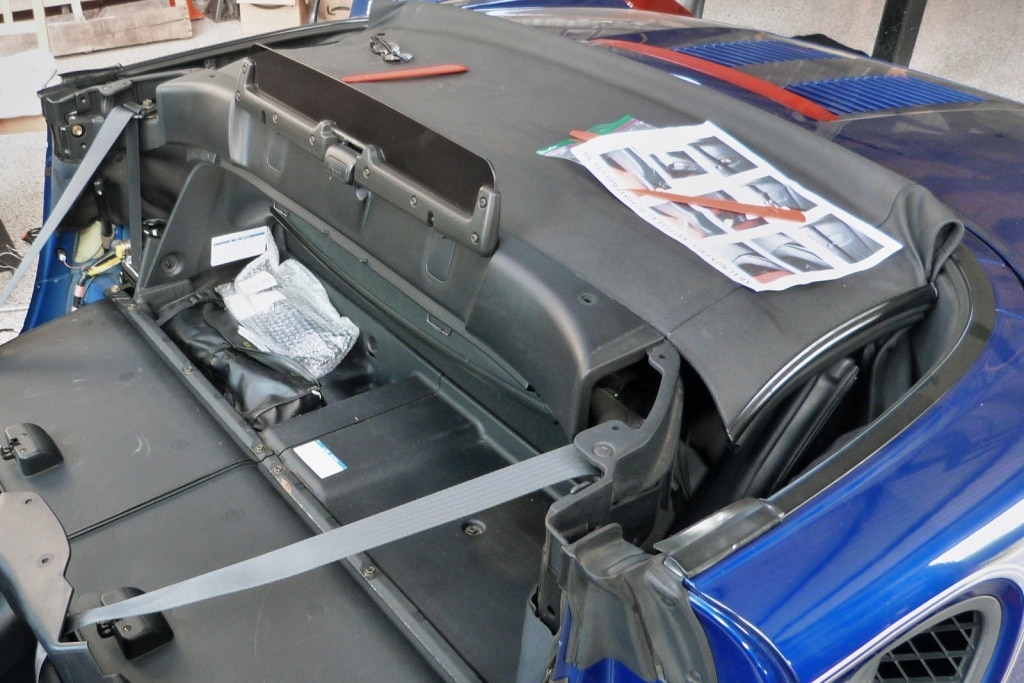
The first thing to do is to remove a couple of the pieces of plastic trim, in order to get enough space to remove the stock deflector and install the new one. For me, I already had my seats removed because I’m going to be getting them re-upholstered, but I highly suggest considering it if you are going to be doing this. I cannot imagine trying to finagle this awkward part with the seats in the way. Not a requirement, but the 10 minutes it takes to remove the seats will save you a lot more than that.
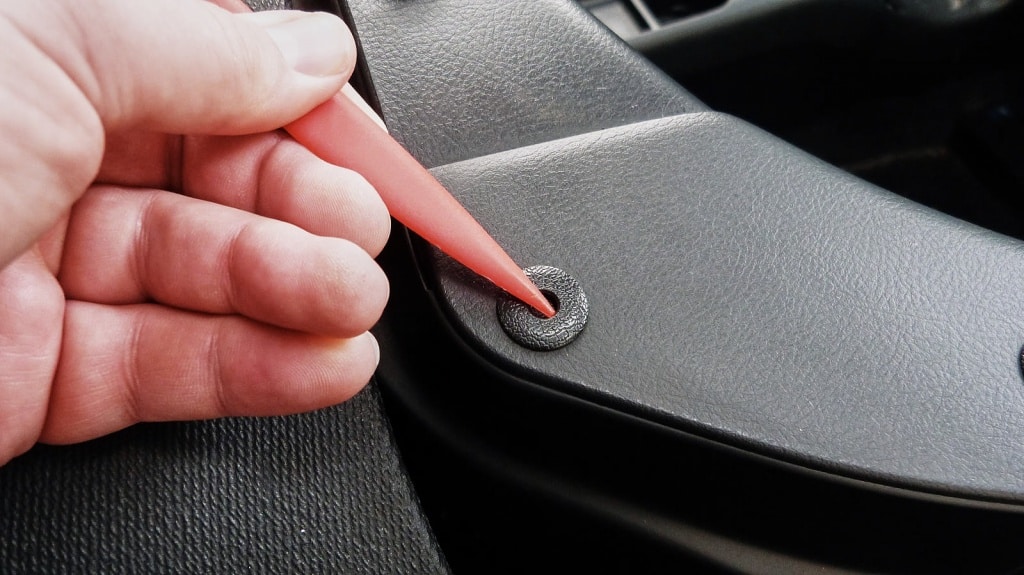
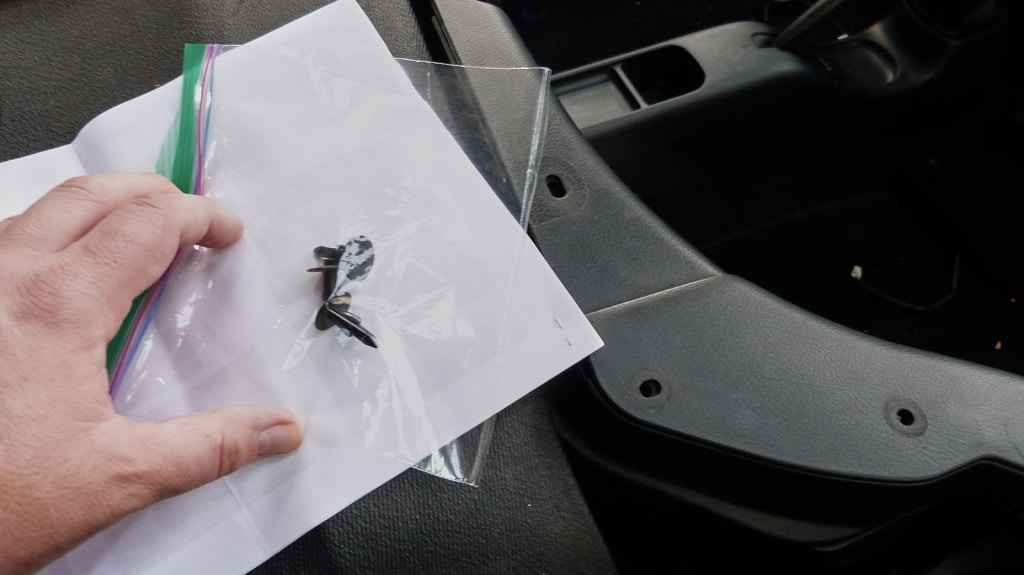
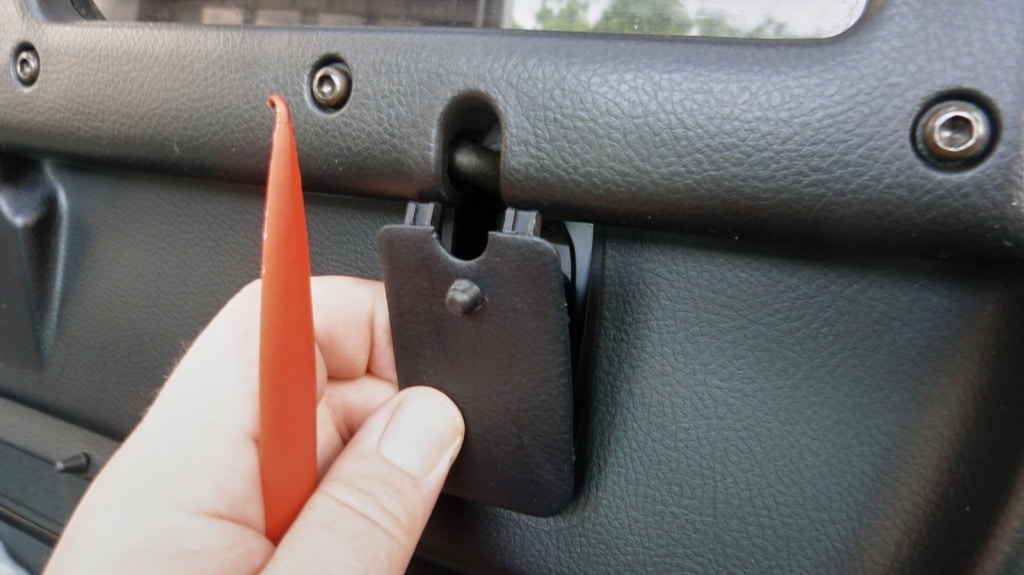
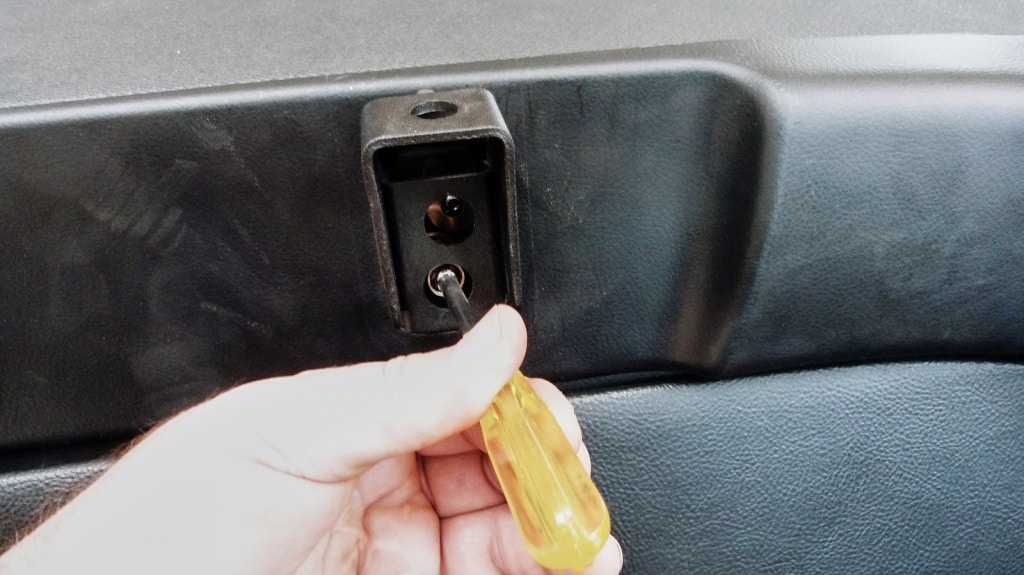
Doing these clips is dead easy. First you push in the center piece, like this:
You’ll want to make sure that you use a plastic trim removal kit, by the way. If you don’t have one, you should. They’re dirt cheap and extremely useful for not screwing up plastic parts. The one I got is less than $17 on Amazon.
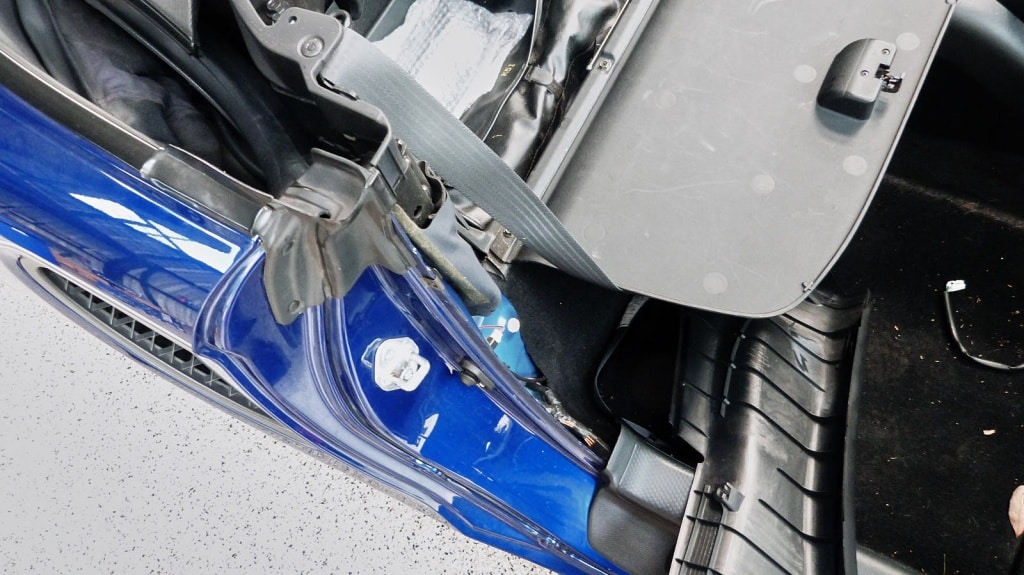
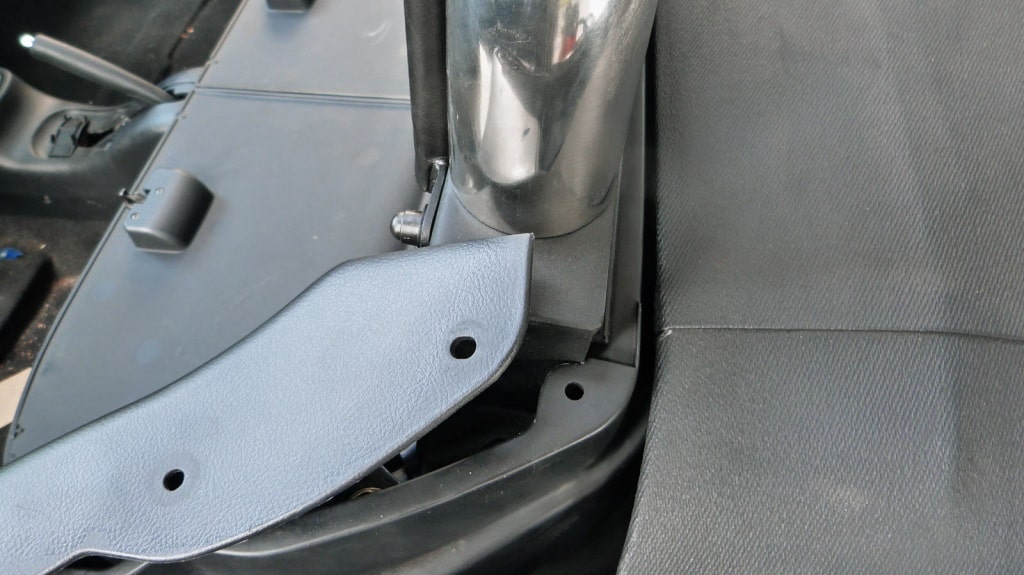
Once that’s done on both sides, the seat-belt panel can be pulled away from the body and lain onto the cabin floor. No need to disconnect the seatbelt at all.
At this point, I was beginning to get a little worried – it was feeling a little too easy, as if I were going to be missing some piece or attachment or something. But, that didn’t actually happen, so if you feel like there should be more fasteners and attachments (like I did), there aren’t.
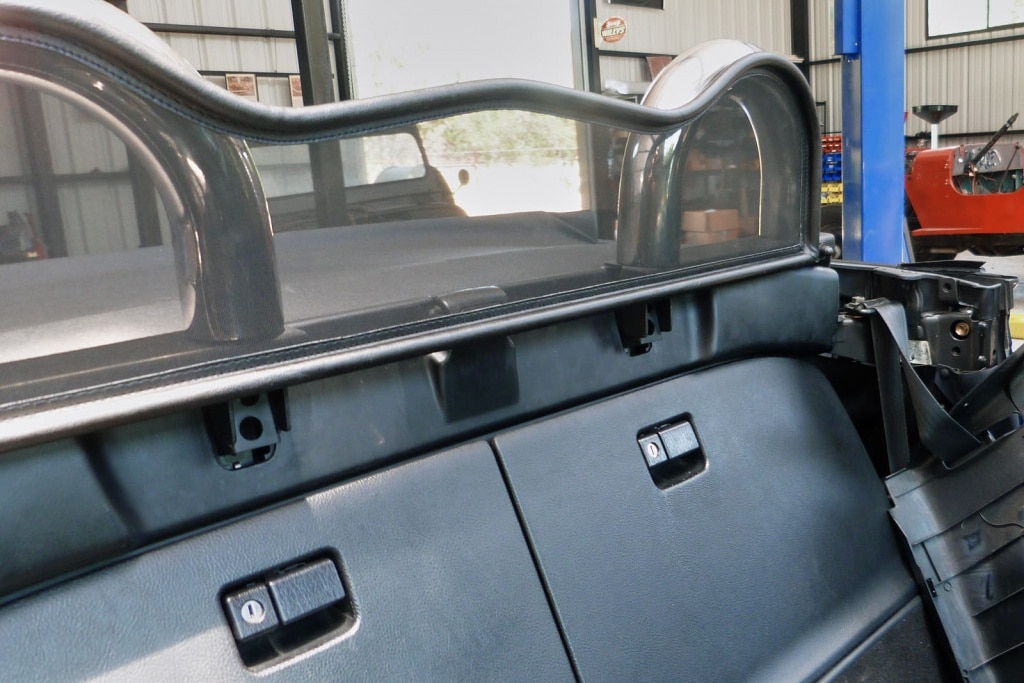
Now that the side panels are apart, you can get started on removing the stock wind deflector.
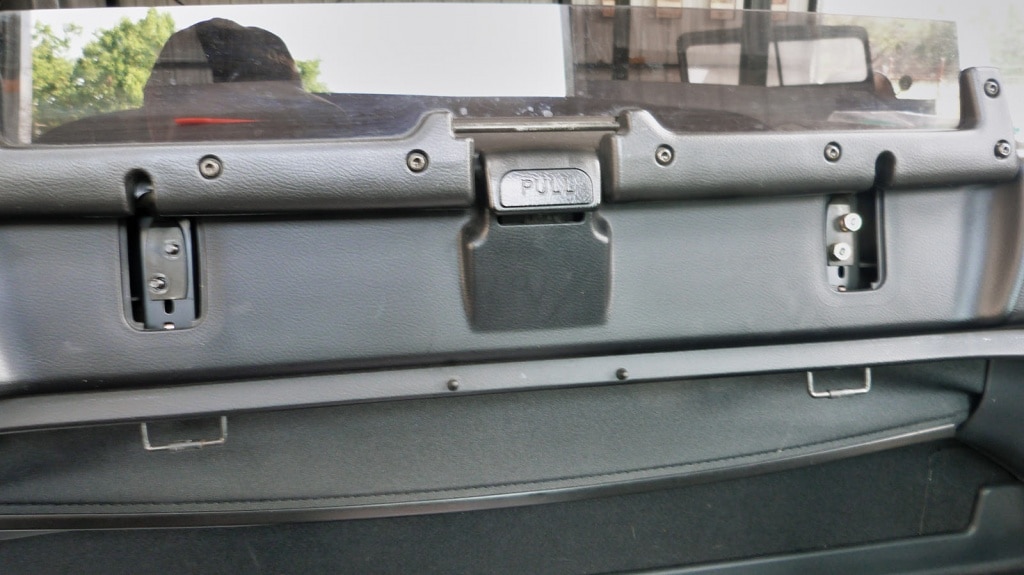
Again, you’ll want to use a trim removal piece. I found the one in the set with the pointy end to be remarkably useful for most of the tasks in this job.
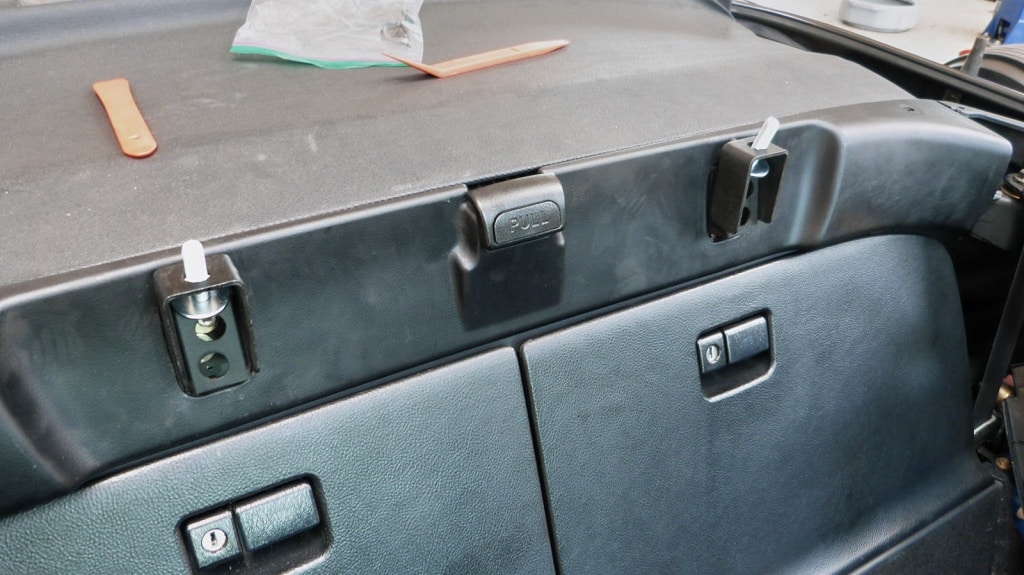
With the covers removed, you can then begin to remove the nuts holding the wind deflector to the chassis. Keep another plastic baggie handy.
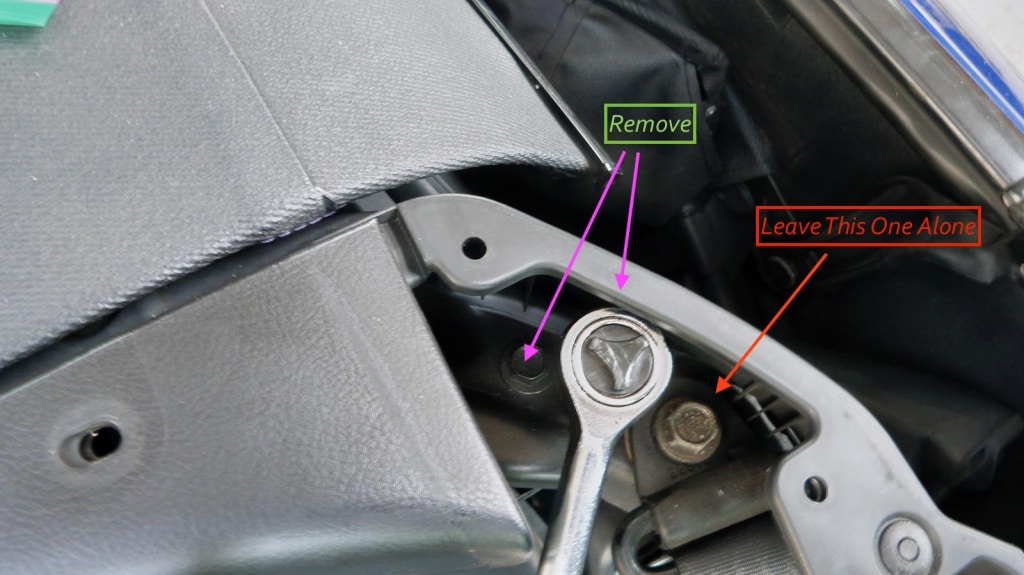
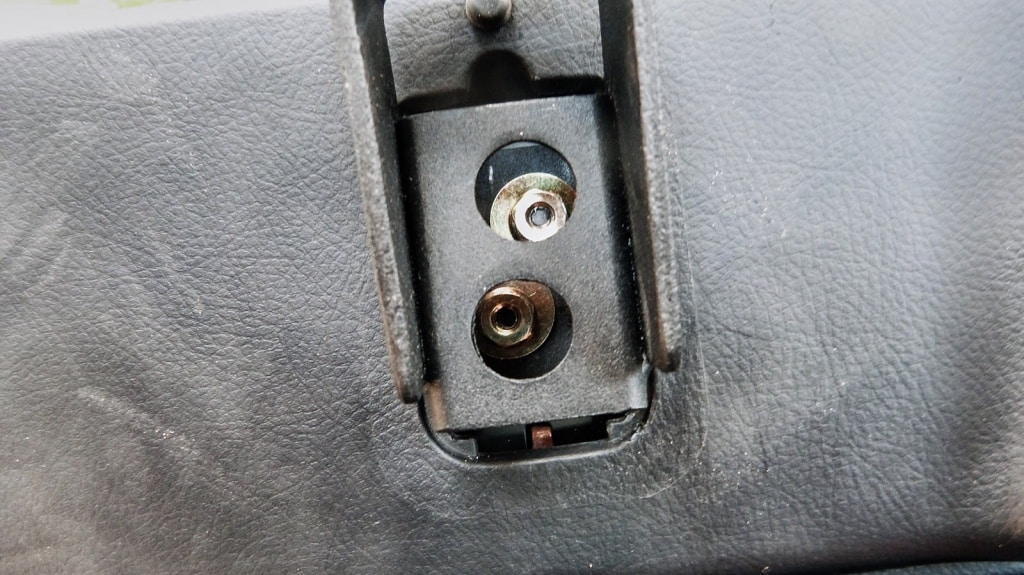
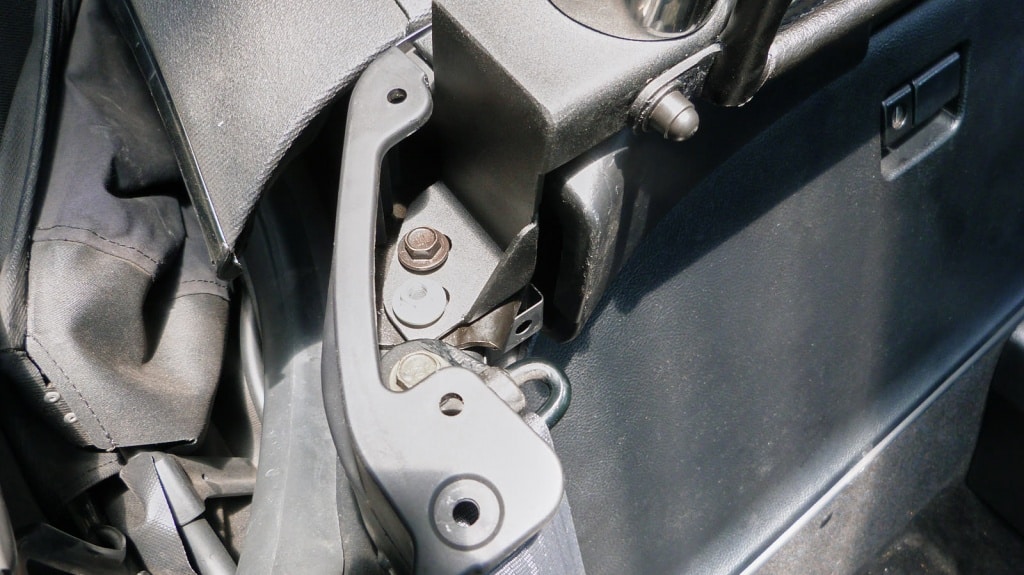
Before you can remove the deflector, though, you’ll need to remove two bolts on either side of the car (making four bolts that need to be removed, total).
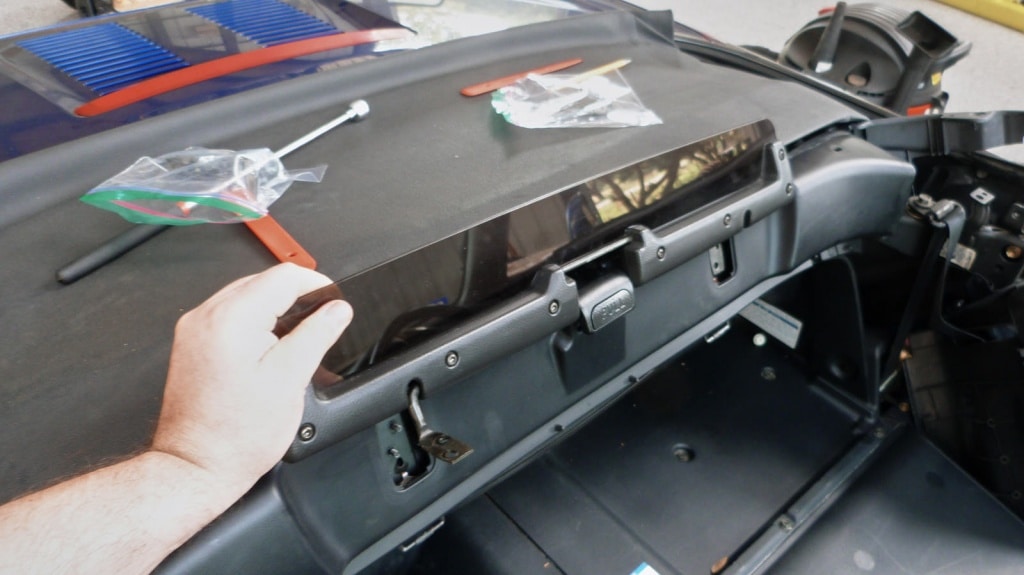
These bolts hold in a retention plate that needs to be loosened in order for the deflector to be removed. Once that happens, it pops right off.
Now, here is where things get wonky.
The instruction photos suggest that you install one loop at a time, directly into the mounting posts. However, there were two issues with this.
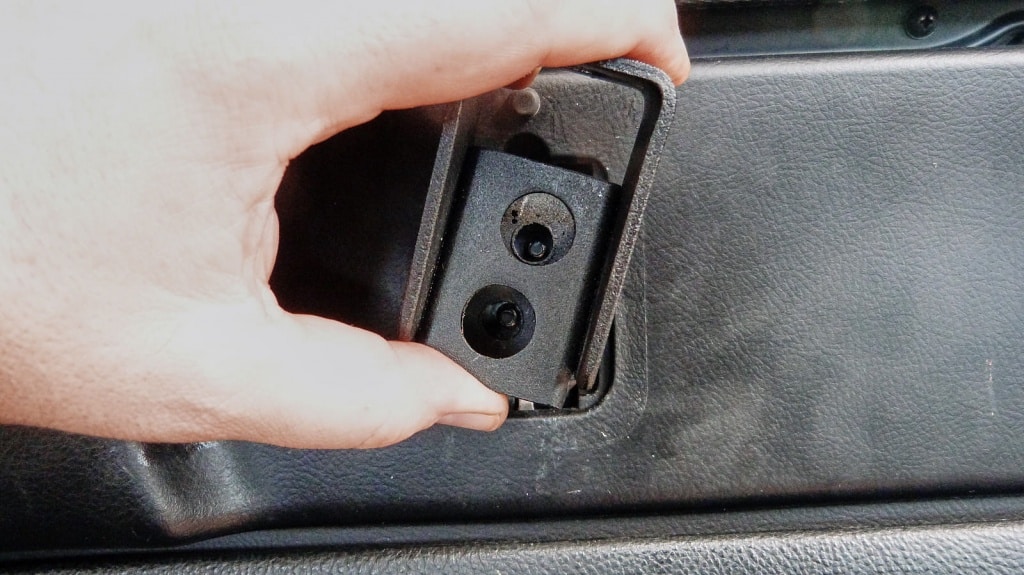
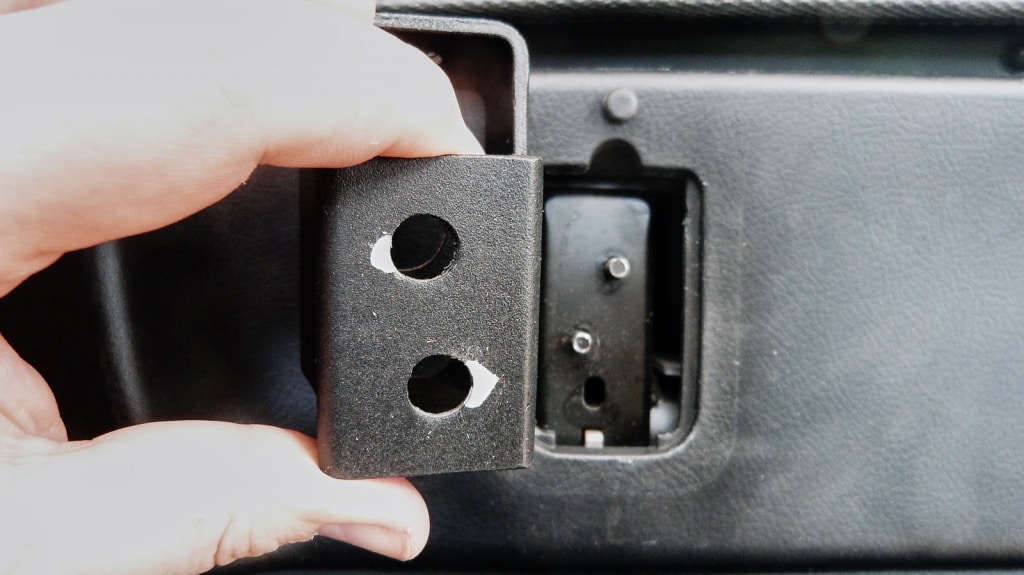
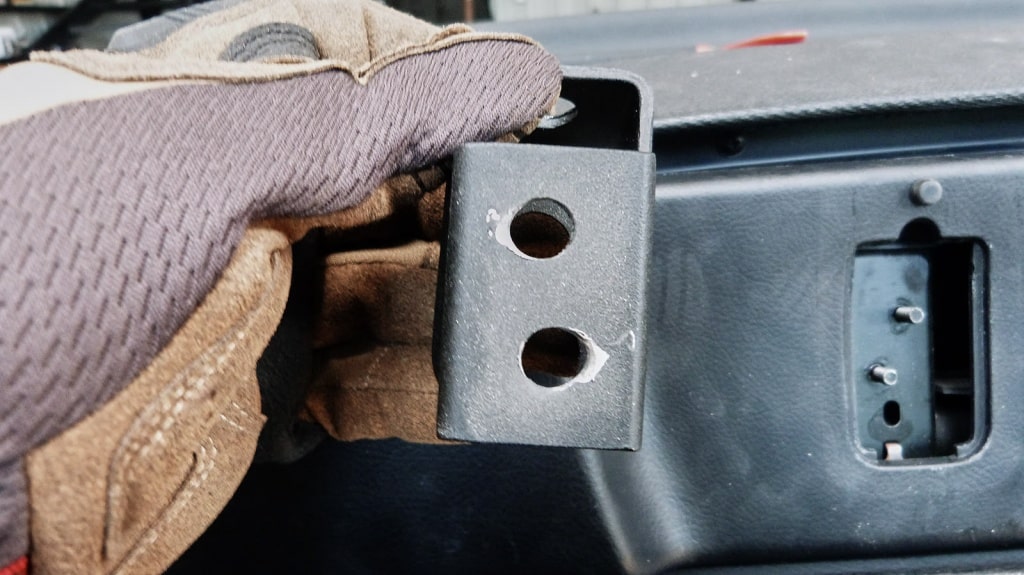
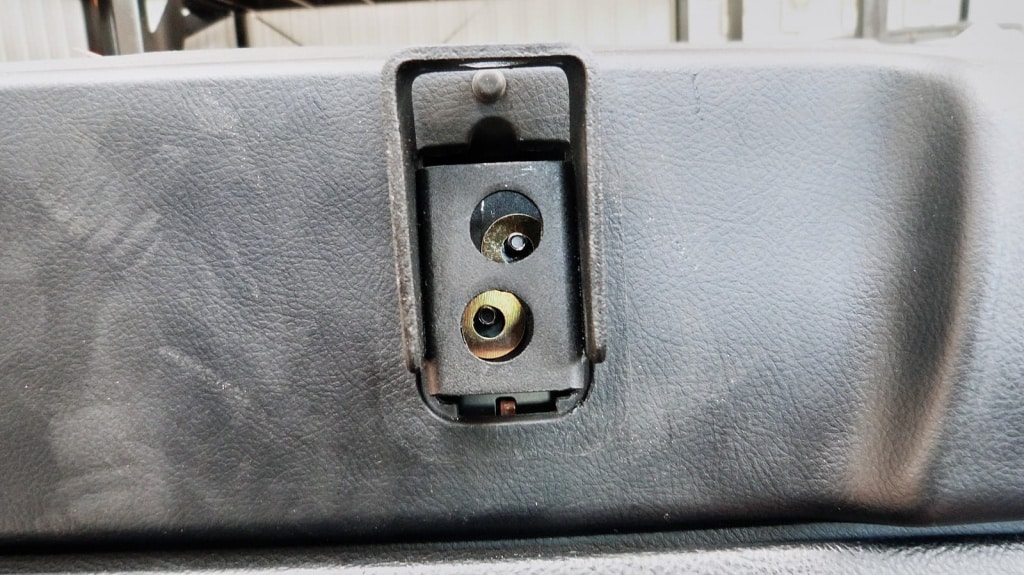
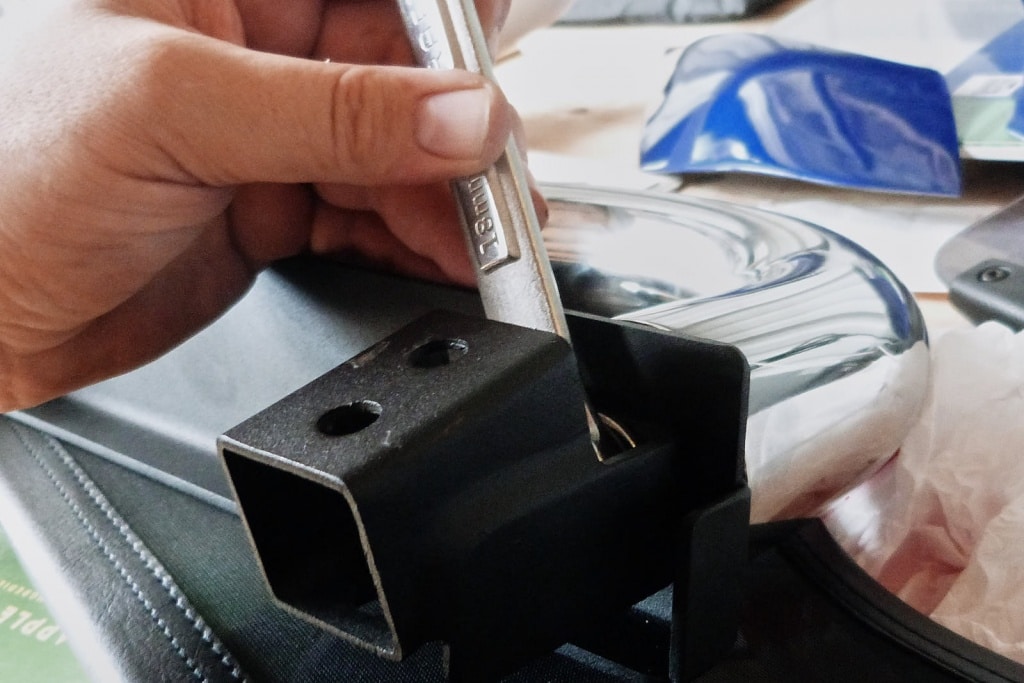
First, the loops don’t come apart (as noted above). I wish they did, but they didn’t. Second, it turns out that the mounting brackets are, well… see for yourself:
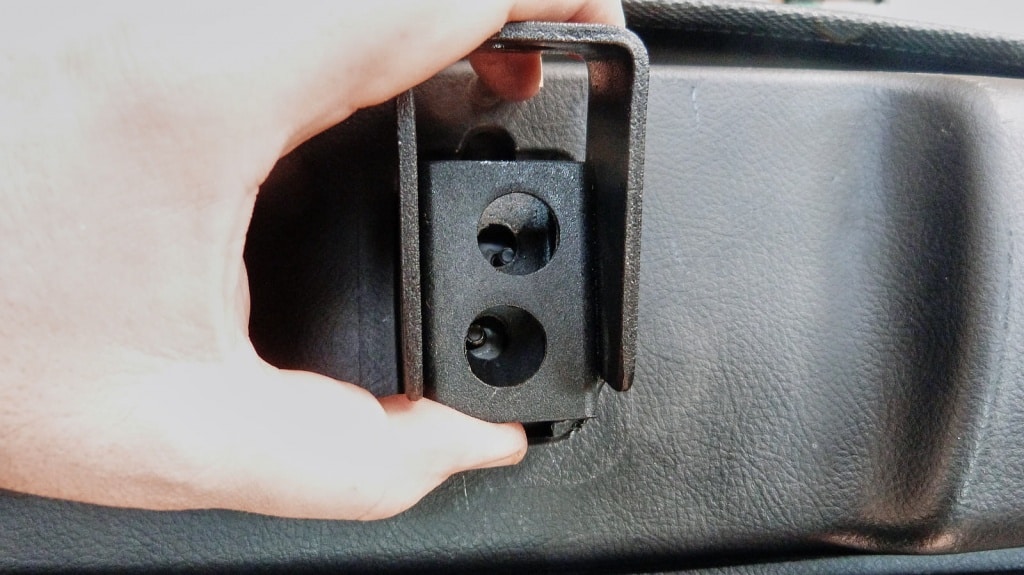
After faffing about with the awkwardness of the loops (which are attached only at one end to the deflector), I decided to take the bracket off and try to see if it would fit into the plastic hole on it’s own. It was a very snug fit, but it did actually fit. However, the holes in the bracket did not line up correctly when doing so.
I’m glad that I took the bracket off, because originally I was thinking about simply cutting away some of the plastic in order to get it fit, but as you can see from the photo above, in order to get the holes to align the bracket would have to be so cock-eyed that it wouldn’t seat level on the car.
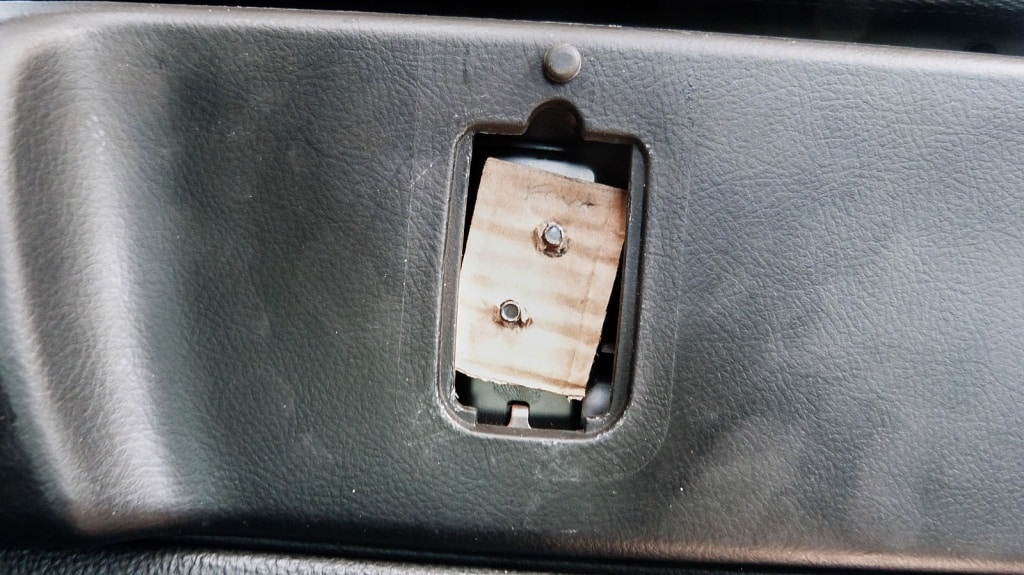
So, I used a piece of cardboard to make a template, which really showed just how lopsided the aftermarket part was.
Straightening out the cardboard template, it showed me exactly where I needed to Dremel the bracket.
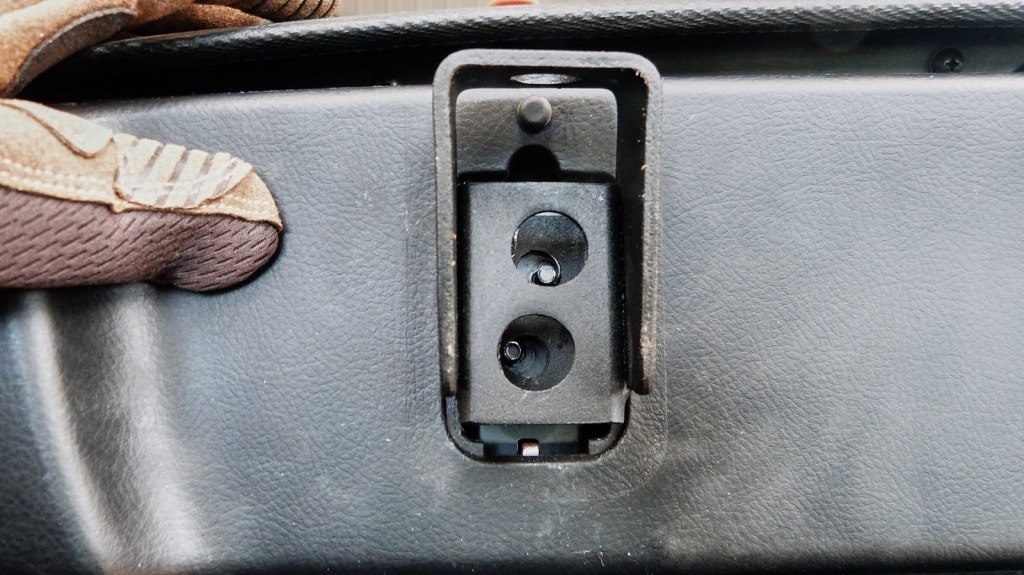
A few minutes later, and I had the brackets adjusted so that they would work with the correct post locations.
Just a little bit of the opening helped get it to sit properly on the mounting posts and inside the plastic opening.
From here, it took a bit of finagling, but I managed to get a couple of washers in there to provide extra support, now that the bracket openings were widened.
From there, it took a little care to tighten the nut back on, because you don’t want to lose the washer (easily replaceable if lost) or the nut (not replaceable at all).
Not it came time to install the loop bar, finally.
Here There Be Dragons
Now, here is where I tell you to not do what I tried to do.
This was the part that was the most frustrating, to be honest. Because the style bar was all one piece (and made things awkward), I had thought that what I could do was install the brackets and then mount the bar onto the brackets, like this:
Ummm… no.
In order to get the bolt back through the bracket and into the loop bar, you have a very small window to reach.
After trying for more than 45 minutes (with help from my wife – this is where you definitely need the second pair of hands!), I chose a different tack.
Instead, I removed the brackets from the car, and re-attached them to the loop on the workbench. Make sure if/when you do this that you have the brackets properly oriented (they can spin while you’re trying to tighten them) to be flush against the body of the car, and make sure that the bolts are tight.
Installing the entire assembly while needing to keep my fingers in the brackets to hold onto the washers was… tricky. There was no way I could have done it by myself, so if you have to do it this way I highly recommend getting a friend to help you stabilize the assembly while you fiddle with the washers and nuts.
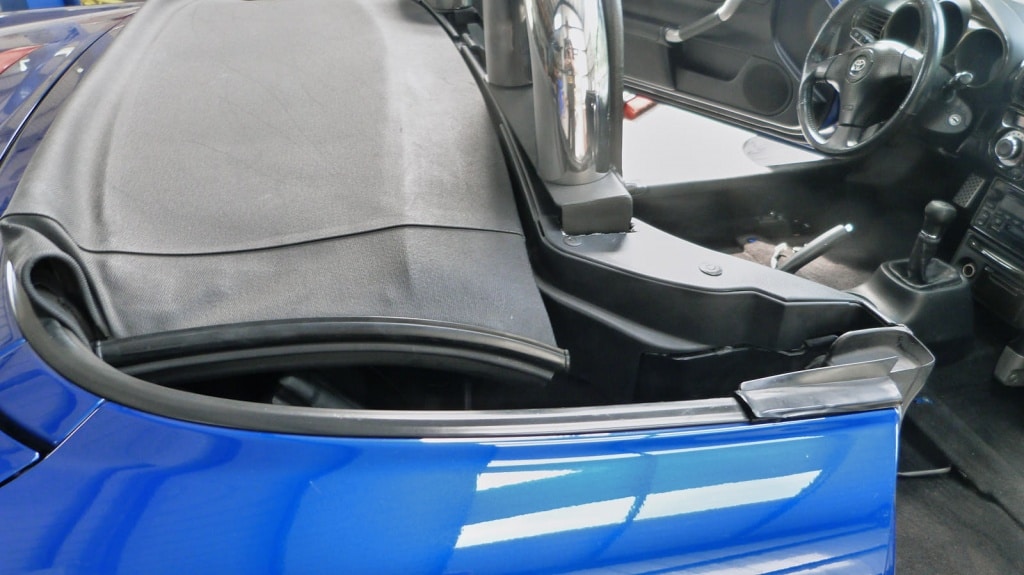
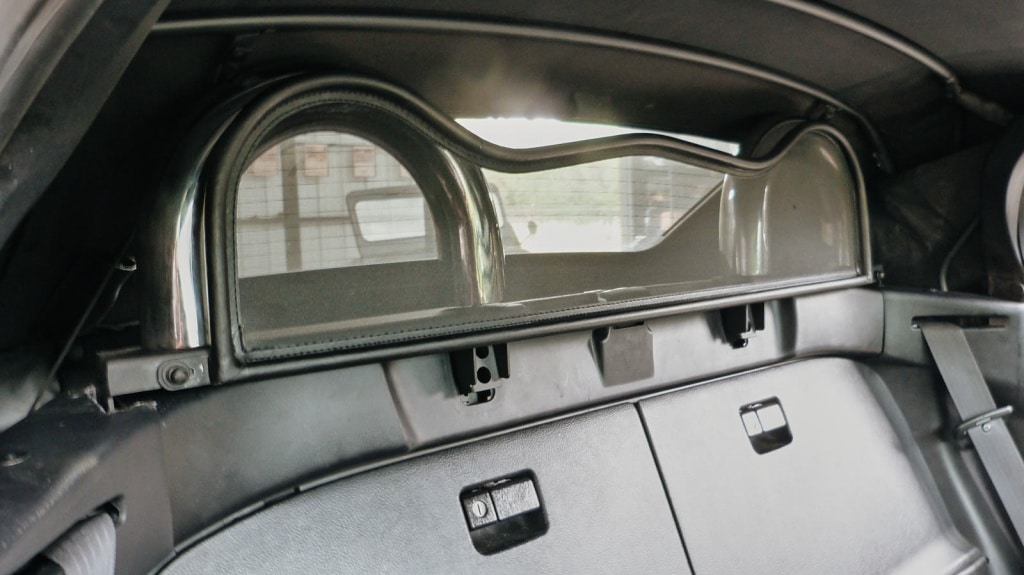
When you finally get it situated, you’ll notice that the brackets protrude from the plastic cover, preventing the replacement of the plastic cover.
With that completed, it’s time to re-bolt the ends to secure the loop bar in place, properly.
Point of No Return
Up until this point, nothing you’ve done has been permanent or destructive. You can always undo what you’ve done and go back to the way it was.
Now, though, is where you can’t go back.
The loop bar is well-made, and a very sturdy piece of metal. However, it takes up a lot more real-estate than the stock wind deflector, and as a result it overlaps the plastic panel that you removed.
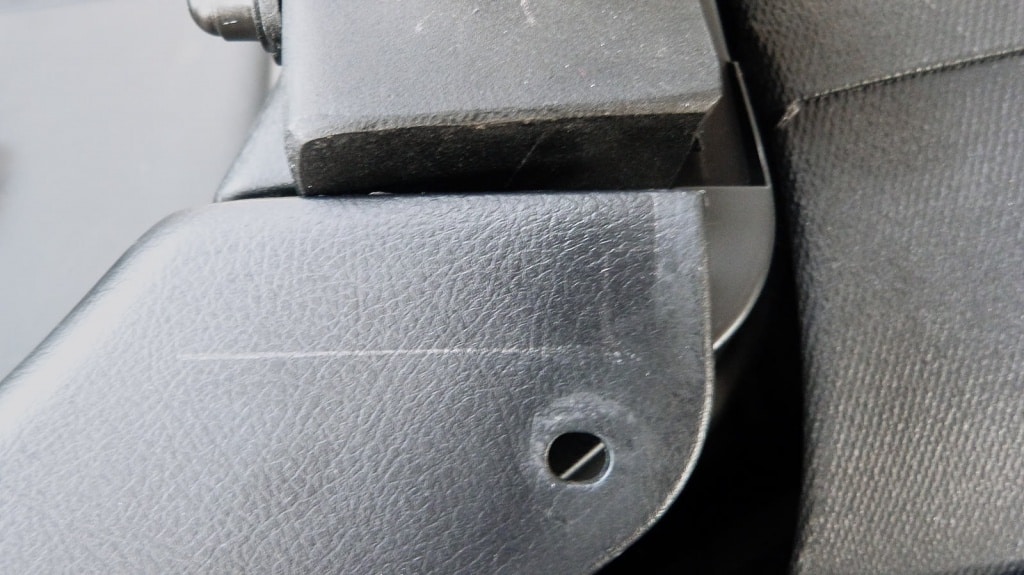
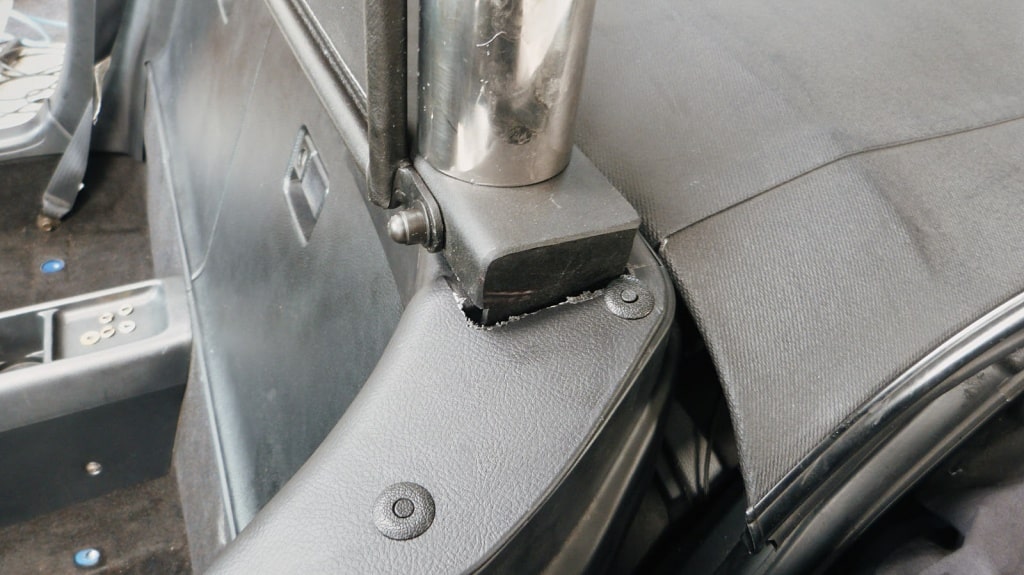
Unfortunately, this means that you are going to have to create a cut-out for the plastic to surround the metal brace.
The installation pictures that came with the loop bar showed someone cutting this part with a hacksaw. I was concerned about my ability to control a hacksaw in such an awkward space on the car (and afraid of slipping), so I opted for a Dremel tool instead.
Thinking that the Dremel tool would provide a cleaner cut, I was a bit surprised to find out that this was not the case. First, the Dremel melted much of the plastic, causing it to mix with the shavings into burrs that needed to be removed. Second, the Dremel tool (with it’s rotational cutting piece) didn’t lend itself to sharp corners very well, and couple that with the extra debris that was melting-then-cooling, it didn’t come out nearly as clean as I had hoped.
Also, despite my best efforts of trying to protect what was underneath, it appears I accidentally touched the Dremel tool to the loop bar, causing a pretty nasty scratch. Oh well.
In retrospect, if I were to do it over, I would have probably tried an exacto knife first, or something similar. I didn’t think that the blade would be strong enough to cut through the plastic, though, which is why I went with the Dremel. Or, maybe I’m just not that talented, who knows?
While not very pretty and it doesn’t look like it’s supposed to be there, it wasn’t too bad, overall.
I’m thinking that I might be able to find some rubber grommit-like things that I can fit over the jagged and uneven cutting lines, so feel free to recommend a solution here in the comments. 🙂
Final Product
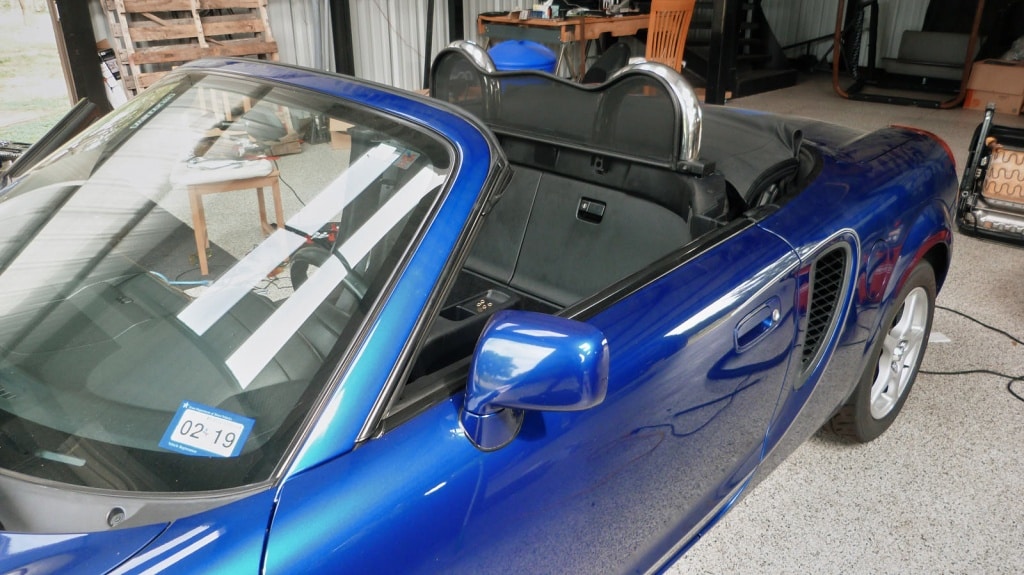
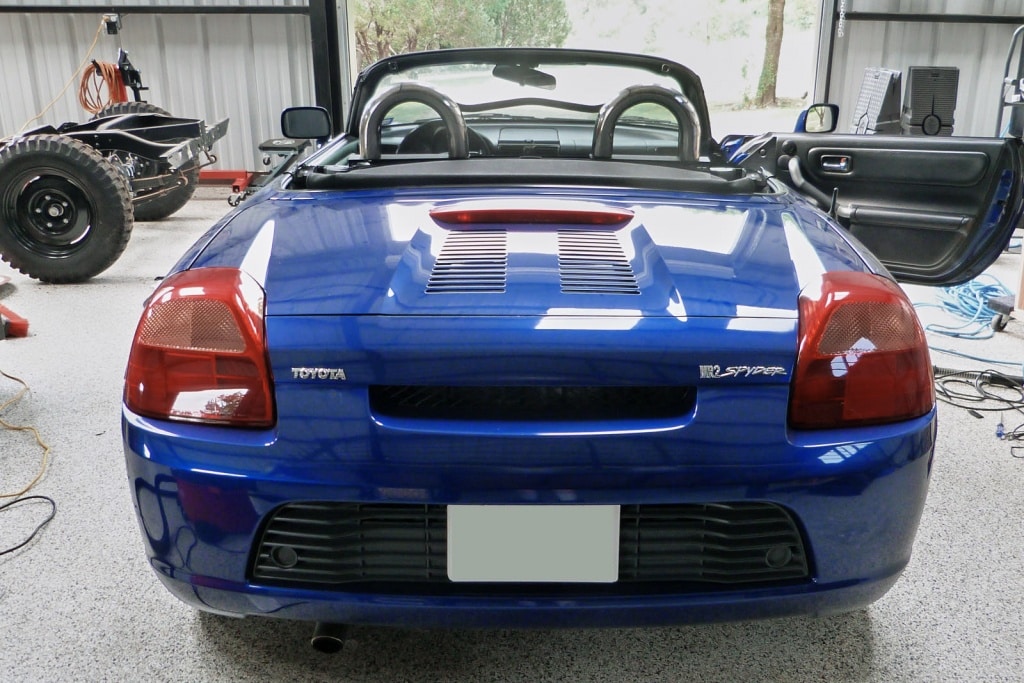
All in all, I’m pleased with the result.
I think that the loop bar – for all its flaws – is well made. I’m a bit annoyed that the marketing materials from cabriosupply.com explicitly stated that the wind deflector could be removed from the loops (and even showed it in the photos), but didn’t actually work that way.
I’m also annoyed that, again despite the marketing materials where they say that “every deflector is custom made for your specific car,” the hole pattern was so horribly out of whack. Granted, when you buy after-market parts it is expected that they’re not going to fit correctly and you’re going to have to make some adjustments. I get that. But this seems like such an easy thing to measure and get right for a part like this.
One thing to note, however, is that while the loop bar fits nicely with the top up, you must take care when opening and closing the top. The front latches on the convertible top will hit the loops every time, and the loops do make closing the top a bit more precarious. Nothing major, just something to be aware of.
However, I think that the style does go well with the car. There are not a lot of sharp angles on the Spyder, and the look does seem to feel mostly organic.
I’m not too crazy about the silver, and I would have much preferred it to be in a black gloss to be a bit more understated. There are ways of possibly toning it down, though, perhaps with a wrap or something along those lines.
At the very least, though, I do think that the bar has improved the appearance of the Spyder without going over the top.
If you decide to do this, I hope you found this pictorial helpful.

Comments
Pingback: MR2: Modification Updates and Progress (Pictorial) – J Metz's Blog